

Deploy & host
Scheduled tasks
Run work on a schedule in your published app, such as daily reminders, weekly summaries, or cleanup.
A scheduled task runs part of your app's server code at set times, with no one visiting the site. Use it for work like emailing a daily digest, sending reminders before appointments, syncing data from another service, or deleting expired records.
Scheduled tasks need a paid plan. On the Free plan, publishing a project with scheduled tasks fails with Scheduled tasks need a paid plan.
Add a scheduled task
Ask the agent for the task and when it should run, such as "Every weekday at 9 AM New York time, email each sales rep their follow-ups for the day." The agent writes the code and adds the schedule to the project. You can also select Add task on the Scheduled tasks page: the chat opens with the request started, so you only add what the task does and when.
- Schedules use UTC. The agent converts the time you ask for, so mention your time zone. Because the schedule stays in UTC, a task can shift by an hour when daylight saving time starts or ends.
- A project can have up to 5 schedules on Pro and up to 20 on Business and Enterprise. A schedule can run as often as every minute.
- Scheduled tasks run only in your published app, and only after you publish. Each publish uses the schedules in that release, so changes take effect the next time you publish. When you roll back, the schedules of the release you roll back to take over.
Your local preview doesn't run tasks on schedule. To test one, ask the agent to run it in the preview, then check the result in your app or its database.
Check your tasks
Open Settings in the project sidebar, then Scheduled tasks. The table lists the schedules of your live release.
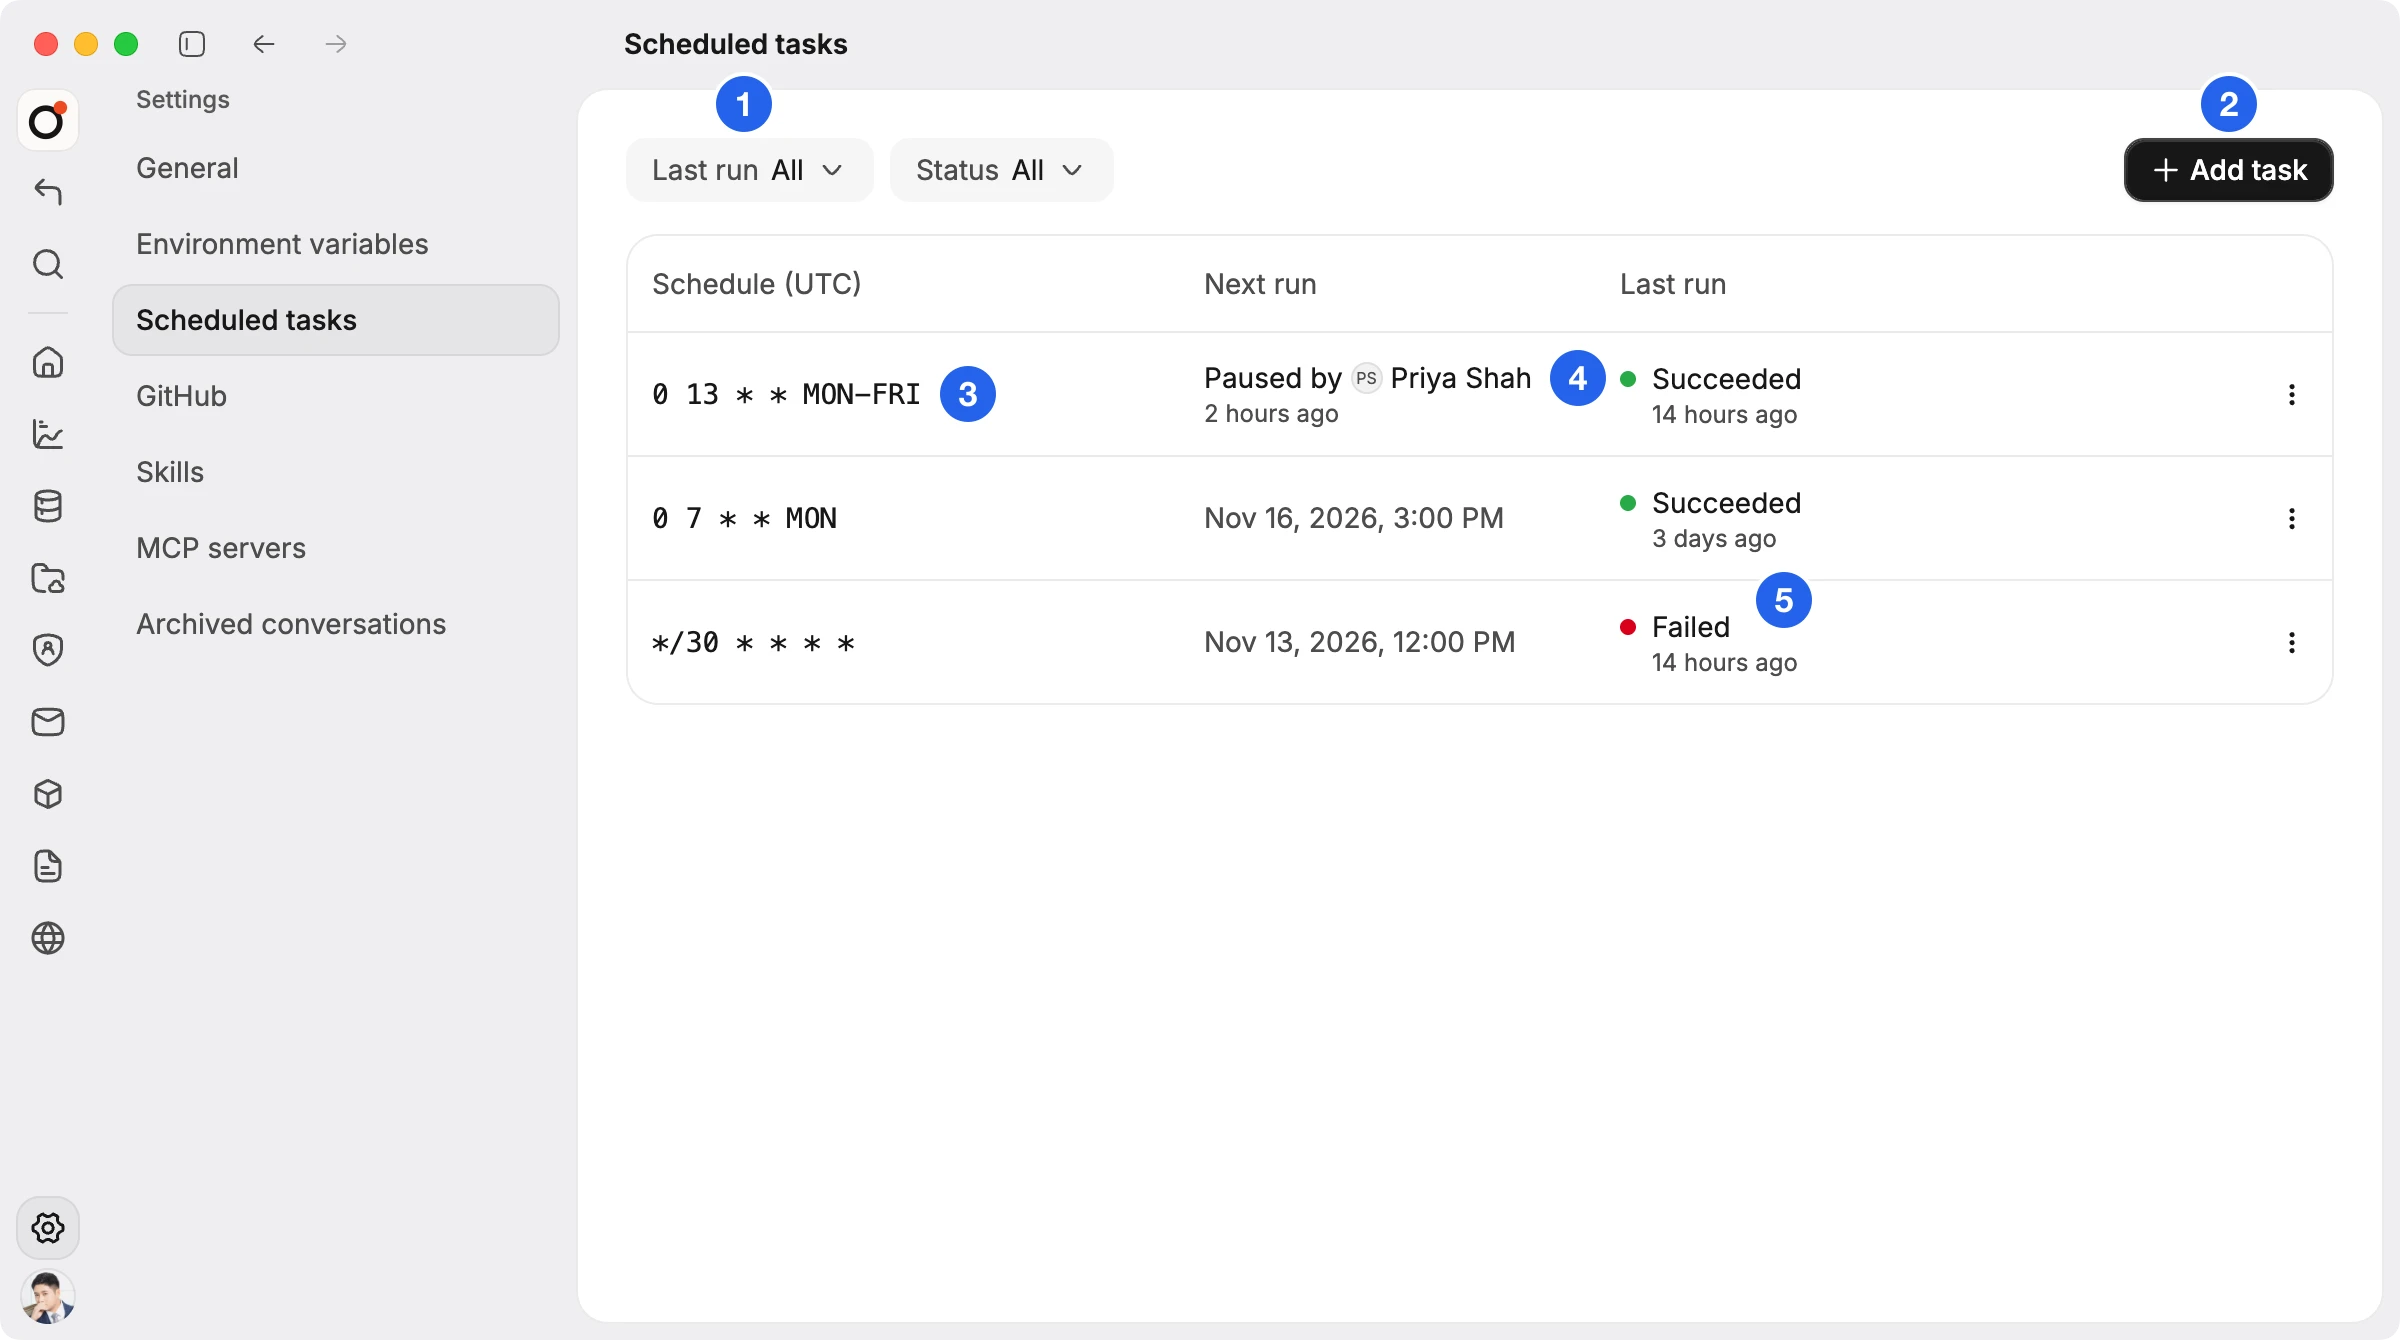
(1) Filter by how the last run went or by whether a task is paused. (2) Add a task with the agent. (3) Point to a schedule to read it in words, in your time zone, such as "Every weekday at 9:00 PM". (4) See who paused a task and when. (5) Check how its last run went.
Last run shows one of these results:
- Succeeded: the task finished without an error.
- Failed: the task threw an error or didn't finish. Point to Failed to see the error. Ask the agent to fix it, then publish again.
- Skipped: the task didn't run because the app was paused or read-only, or the team is no longer on a paid plan. Point to Skipped to see which. See When credits run out and When a database fills up.
Messages a task logs appear in Logs under Online.
Pause a task
To stop a task without changing your app, open the actions at the end of its row and select Pause. Next run shows who paused it and when, and the task doesn't run until someone selects Resume. A paused task stays paused when you publish or roll back.
To remove a task or change when it runs, ask the agent, then publish. The schedule is part of your app's code, so it can't be edited on this page.
How runs work
- Each run can take up to 15 minutes.
- A skipped or failed run isn't retried. The task runs again at its next scheduled time, so ask the agent to make tasks pick up any work an earlier run missed.
- Each run uses credits like a visit to your app. See Billing and usage.
If a task doesn't run
- Publish to run scheduled tasks: the project hasn't been published yet.
- No scheduled tasks: the live release has no schedules. If you just added one, publish again.
- Paused: someone on the team paused the task. Select Resume in its actions.
- The app has no scheduled() handler: the schedule was added without the code that runs it. Ask the agent to finish setting up the task, then publish again.