How to Build a Dropbox-Style File Storage App with AI
Build a Dropbox-style file storage app in Layerwise. Define the item record, plan direct uploads, Trash, and a storage limit, share links, test, and publish.
Table of contents
A file storage app looks simple: a list of files, an upload button, and a share link. The decisions behind it are what earn people's trust. Where do names live, and where do the bytes go? What happens to a file someone deleted by mistake? Who can open a shared link, and for how long? Answer those before asking an AI to write code, and the first version is much easier to test.
This guide builds a Dropbox-style file storage web app with Layerwise. You will define the item record, plan uploads and the storage limit, decide how Trash works, set the rules for share links, start from the Stashbox template or a prompt, test, and publish. To see the result first, sign up on the Stashbox live demo.
1. Define the item record
All files, Recent, Starred, search, and Trash are views of one record, so write it down first. This is the item in Stashbox, simplified from its database schema:
type Item = {
  id: string;
  userId: string; // the owner
  parentId: string | null; // null puts the item in All files
  type: 'file' | 'folder';
  name: string;
  storageKey: string | null; // where the bytes live; null for folders
  size: number; // bytes; 0 for folders
  mimeType: string | null;
  starred: boolean;
  createdAt: Date;
  updatedAt: Date;
  recentAt: Date | null; // last uploaded or opened, for Recent
  trashedAt: Date | null; // set when the item moves to Trash
  trashBatch: string | null; // shared by everything deleted together
  trashRoot: boolean; // the item the person actually deleted
  trashPath: string[] | null; // its folder names, for Restore
};
The key choice is splitting names from bytes. Names and folders live in the project's database. File contents live in the project's Storage under a generated key, files/<user id>/<random id>, which never contains the file name. Renaming a file changes one row, and moving a folder of 500 photos changes one parentId. No bytes are copied.
Copy creates new rows that point at the same storageKey, so a copy is instant. When an item is deleted for good, Stashbox deletes the Storage file only if no other row still uses it. Copies still count toward the owner's space, because the limit is the sum of their item sizes; the alternative is to count each key once.
Two items in one folder can't share a name, ignoring case. An upload or copy that collides becomes report (1).pdf, while Rename refuses a taken name. Put rules like these in your prompt, or the AI will choose for you.
2. Plan uploads and the storage limit
A file can reach Storage through your app's server, but requests through the app carry about 90 MB. Stashbox sends files straight to Storage instead. When a file is picked or dropped, the browser asks the server to start an upload. The server checks three limits: the plan's largest file, which Storage reports, the person's 2 GB, and whether the project's Storage is full. Then it calls env.STORAGE.createUpload() and returns a short-lived link. The browser sends the file there, three at a time, while the upload panel shows progress. Finally the server calls completeUpload() and creates the item row.
The tricky part is space used by uploads in progress. If someone drops ten 300 MB videos at once, each check alone would pass. Stashbox writes each started upload to an uploads table and counts those rows as used space. A canceled or failed upload deletes its row, and rows older than a day stop counting, so an abandoned tab can't hold space forever.
The storage limit is PLAN_LIMIT_BYTES in src/lib/files.ts, 2 GB by default, and files in Trash count toward it. Space comes back only when someone deletes files forever. The project has its own limits too. On the Free plan, a project's Storage holds 1 GB and files can be up to 10 MB, so test large files on a paid plan.
3. Treat Trash as a state
People delete the wrong folder, then expect it back exactly as it was, so Stashbox never removes rows on Delete. It sets trashedAt on the item and everything inside it, and gives them all the same trashBatch. The item the person chose becomes the trashRoot, and it remembers the names of the folders above it in trashPath.
Trash lists only the roots, with their Original location. Restore clears the whole batch at once, so a folder comes back with all its contents. If the folder it came from was deleted too, Restore recreates that folder path from trashPath, or reuses a folder with the same name. Delete forever and Empty trash remove the rows, any share links on them, and the Storage files that nothing else uses.
Stashbox never empties Trash on its own. If you add cleanup, reuse the same purge so shared Storage keys are handled correctly:
Add an Empty Trash after 30 days setting to Settings, on by default. When a
person opens their files, delete their Trash items older than 30 days with
the same code as Delete forever, so files that copies still use are kept.
Show "Items in Trash are deleted after 30 days" at the top of Trash.
4. Decide what a share link allows
Share links open a private app to the public internet, so write down every rule. In Stashbox, each file or folder has at most one link, opened at /s/<token>, where the token is 18 random bytes. The owner can set an Expires date, a Password of at least 4 characters, and an Allow downloads switch. Stop sharing deletes the link, and the same token never works again.
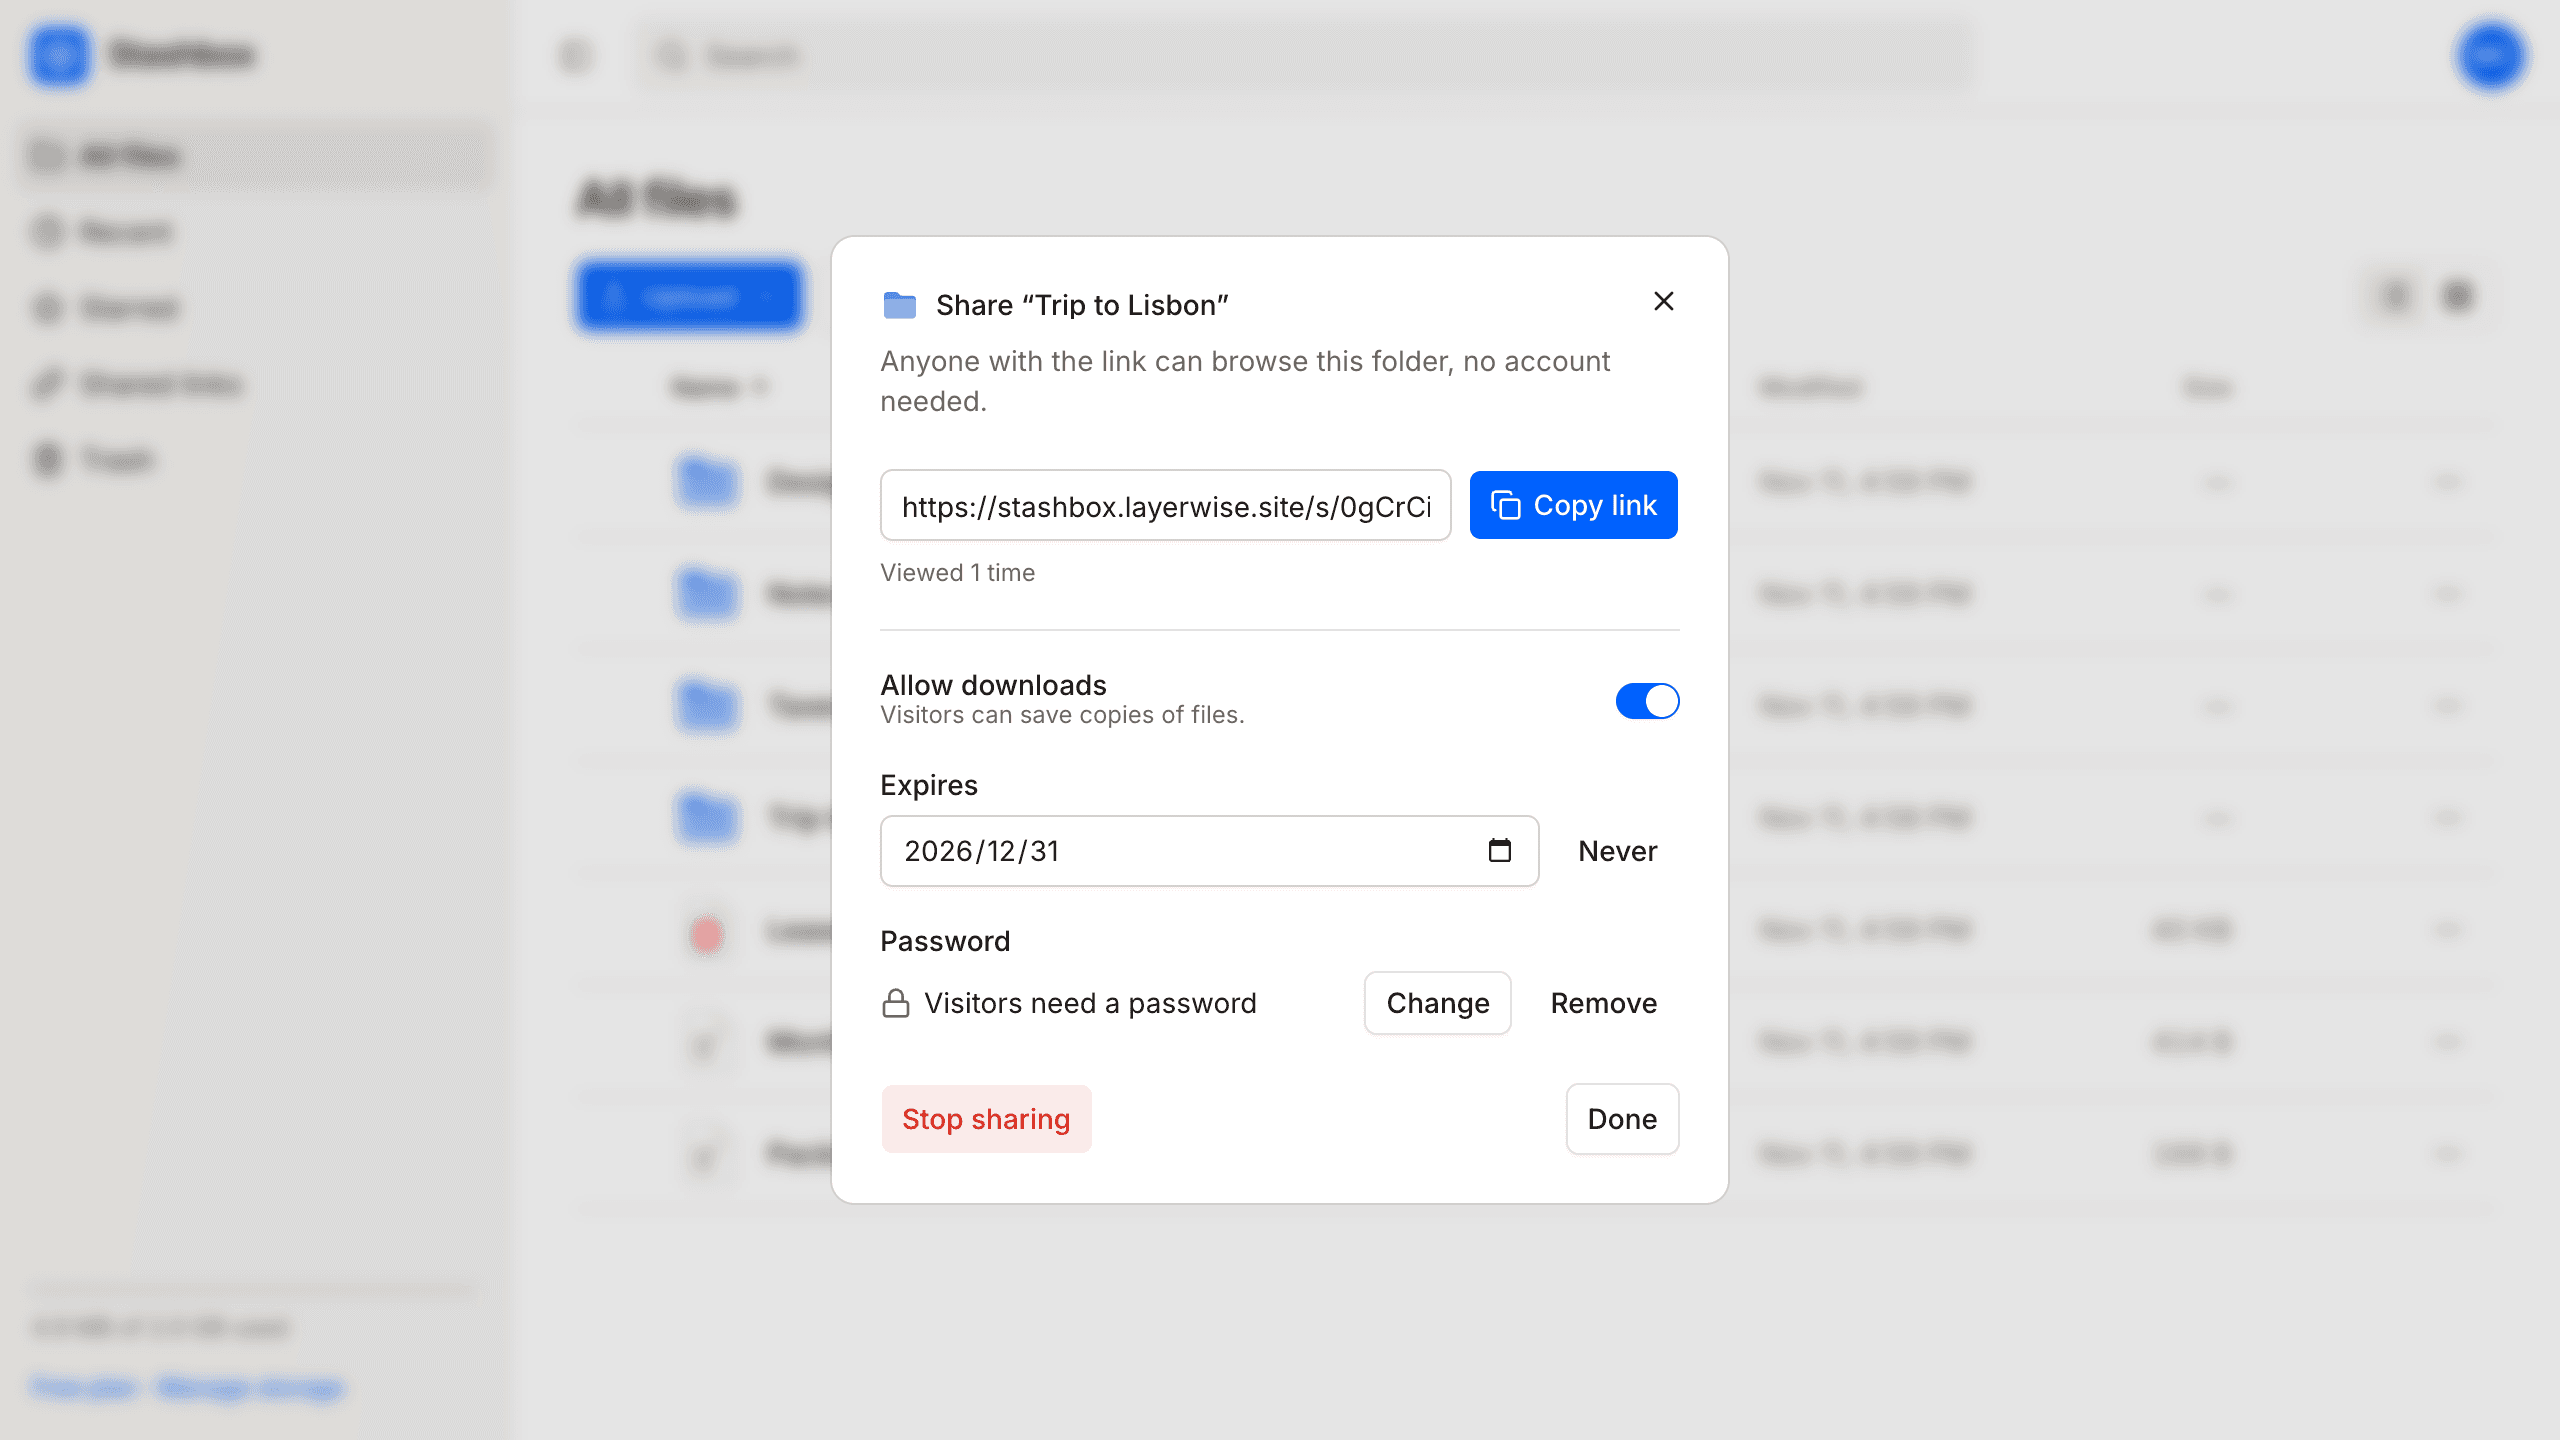
Every check runs on the server, for every request a visitor makes:
- The link must exist, and the shared item must not be in Trash. Moving a shared folder to Trash turns its link off, and restoring it turns the link back on.
- The expiry date must not have passed.
- If the link has a password, the visitor must have entered it. Only a salted PBKDF2 hash is stored, and the pass a visitor gets is derived from it, so changing the password signs everyone out.
- In a shared folder, each folder or file the visitor asks for must be inside it, and no folder along the way may be in Trash.
- Files are served through signed Storage URLs that expire after 15 minutes. When downloads are off, the server refuses download links, and it also refuses view links for files the page can't show in place, such as a CSV or a ZIP, because opening those would download them anyway.
Each visit adds one to the link's view count, once per browser session. The count shows in the Share dialog and on Shared links. Hiding a button is not access control, so keep these checks on the server. A new rule, such as a limit on visits, belongs in the shares table and the same check.
5. Choose a starting point
Download Layerwise, sign in, and select a team.
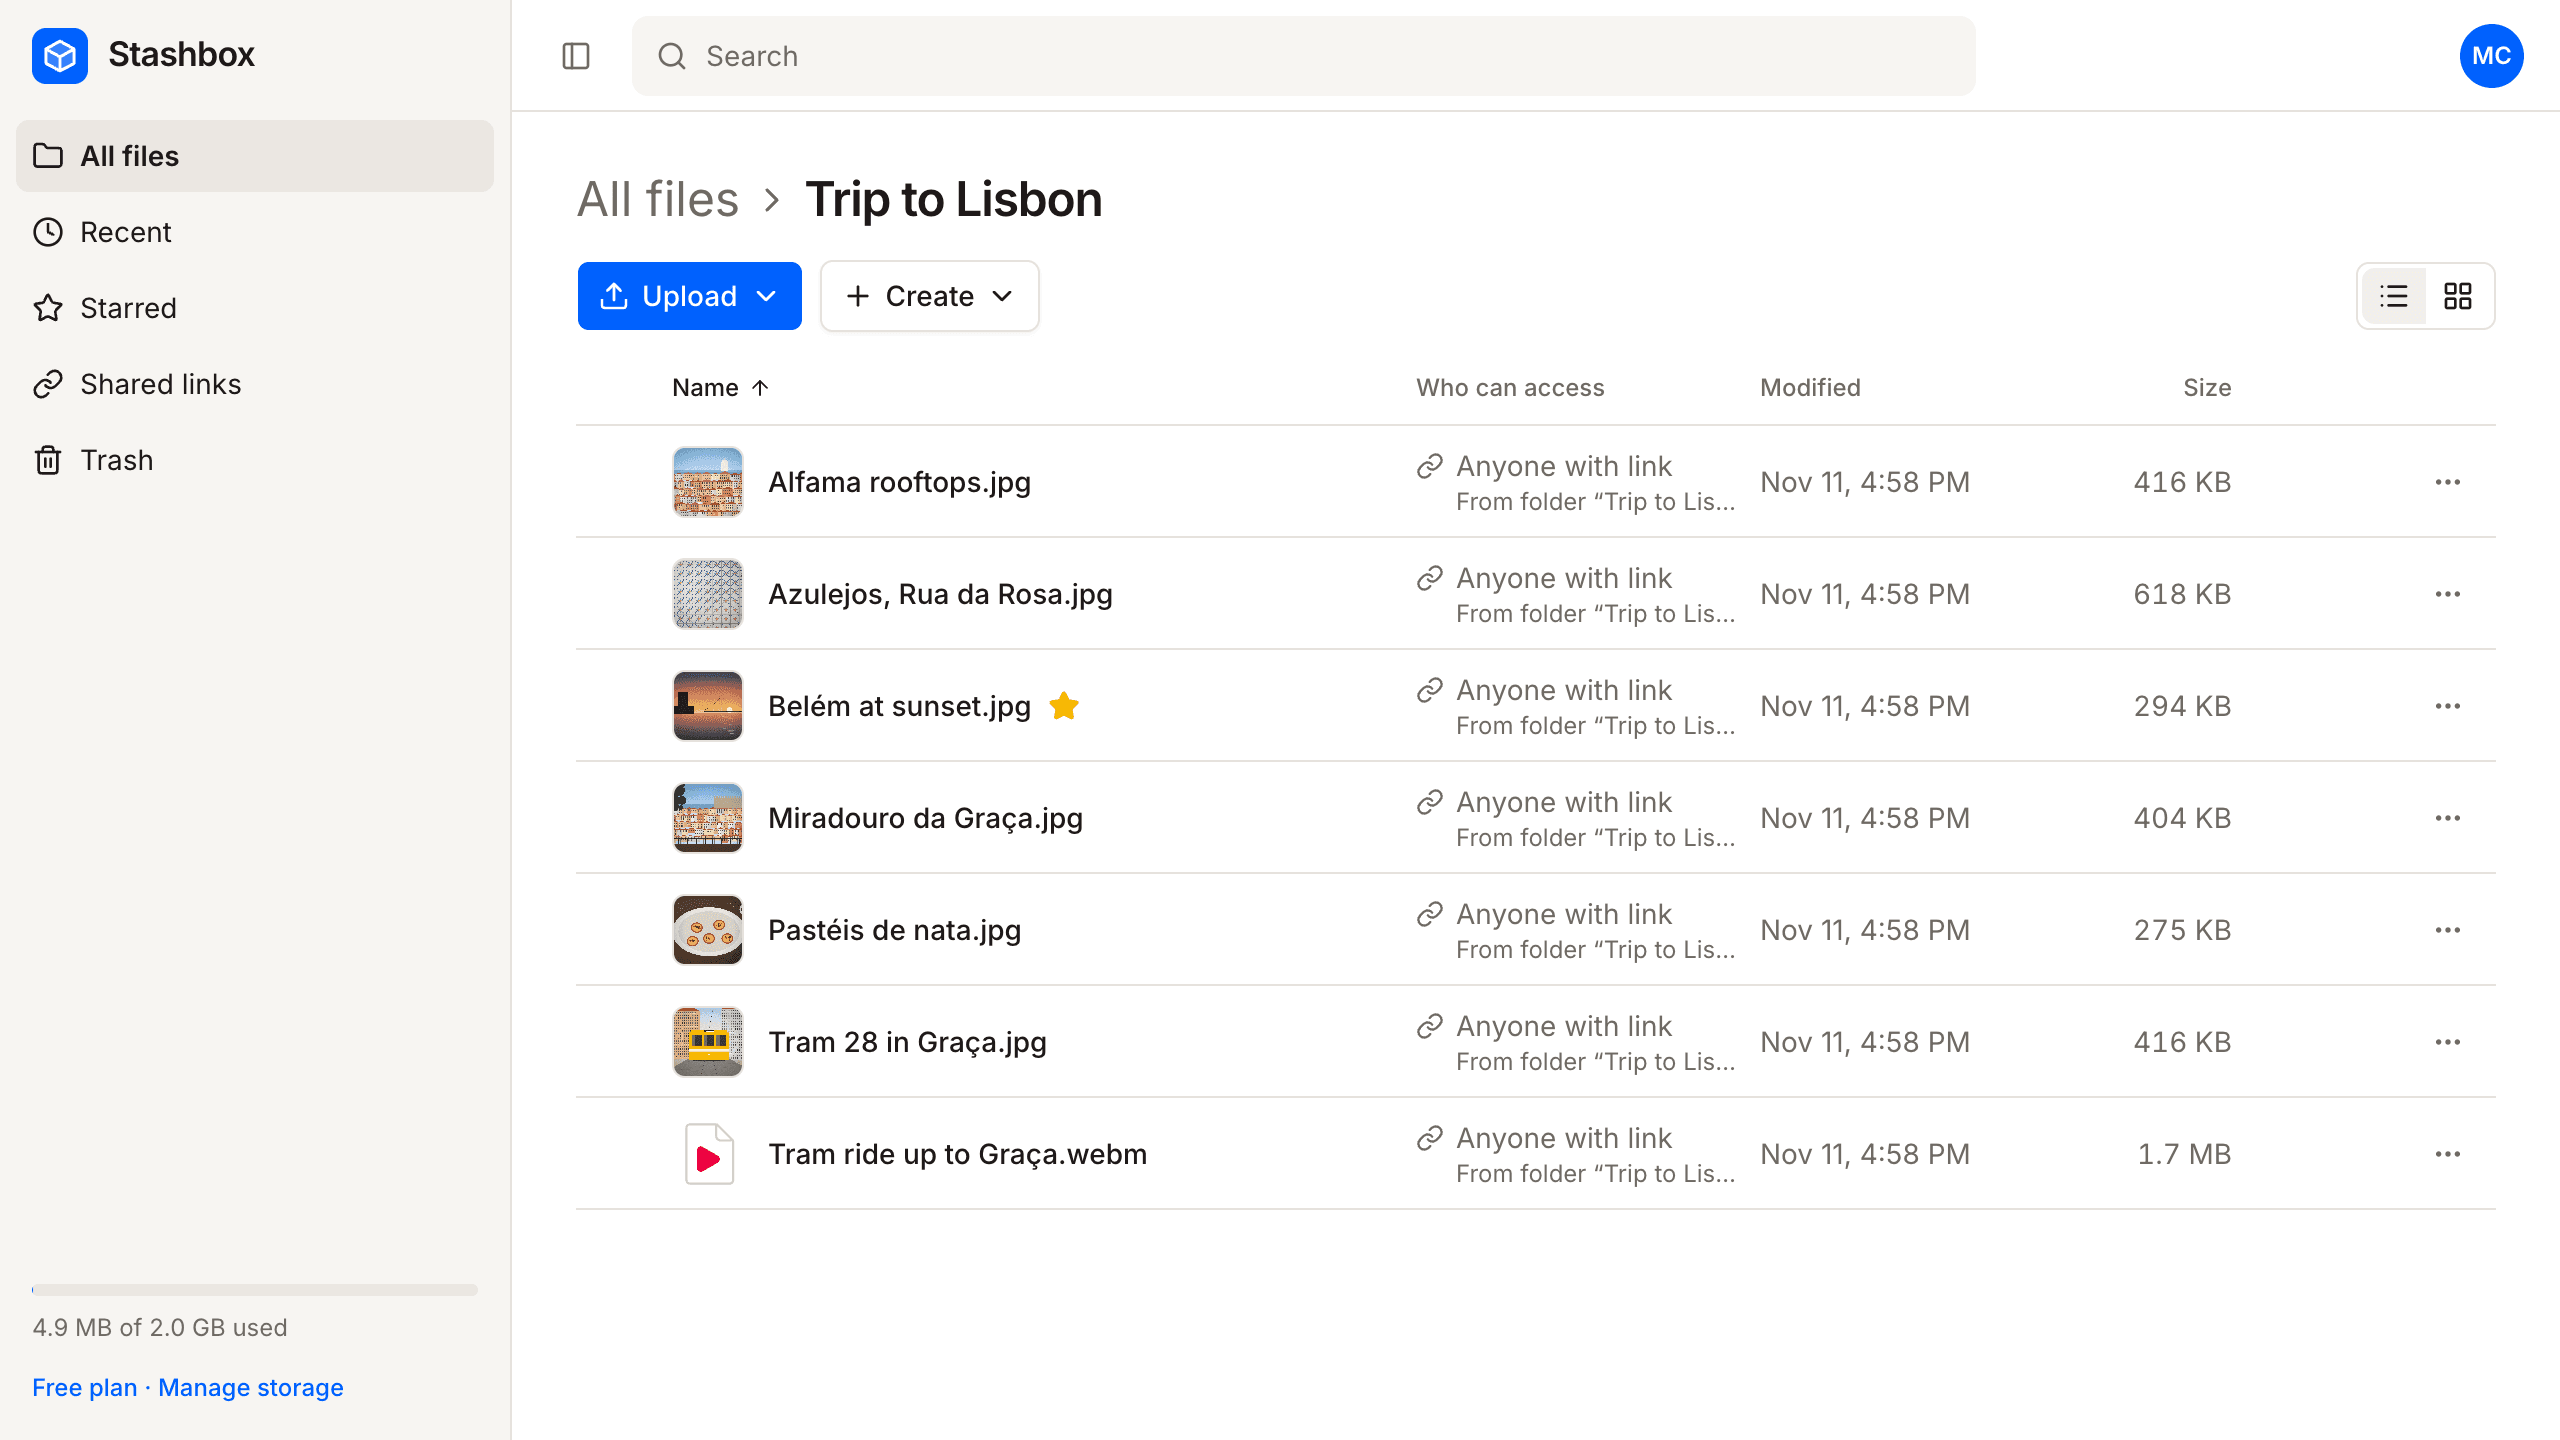
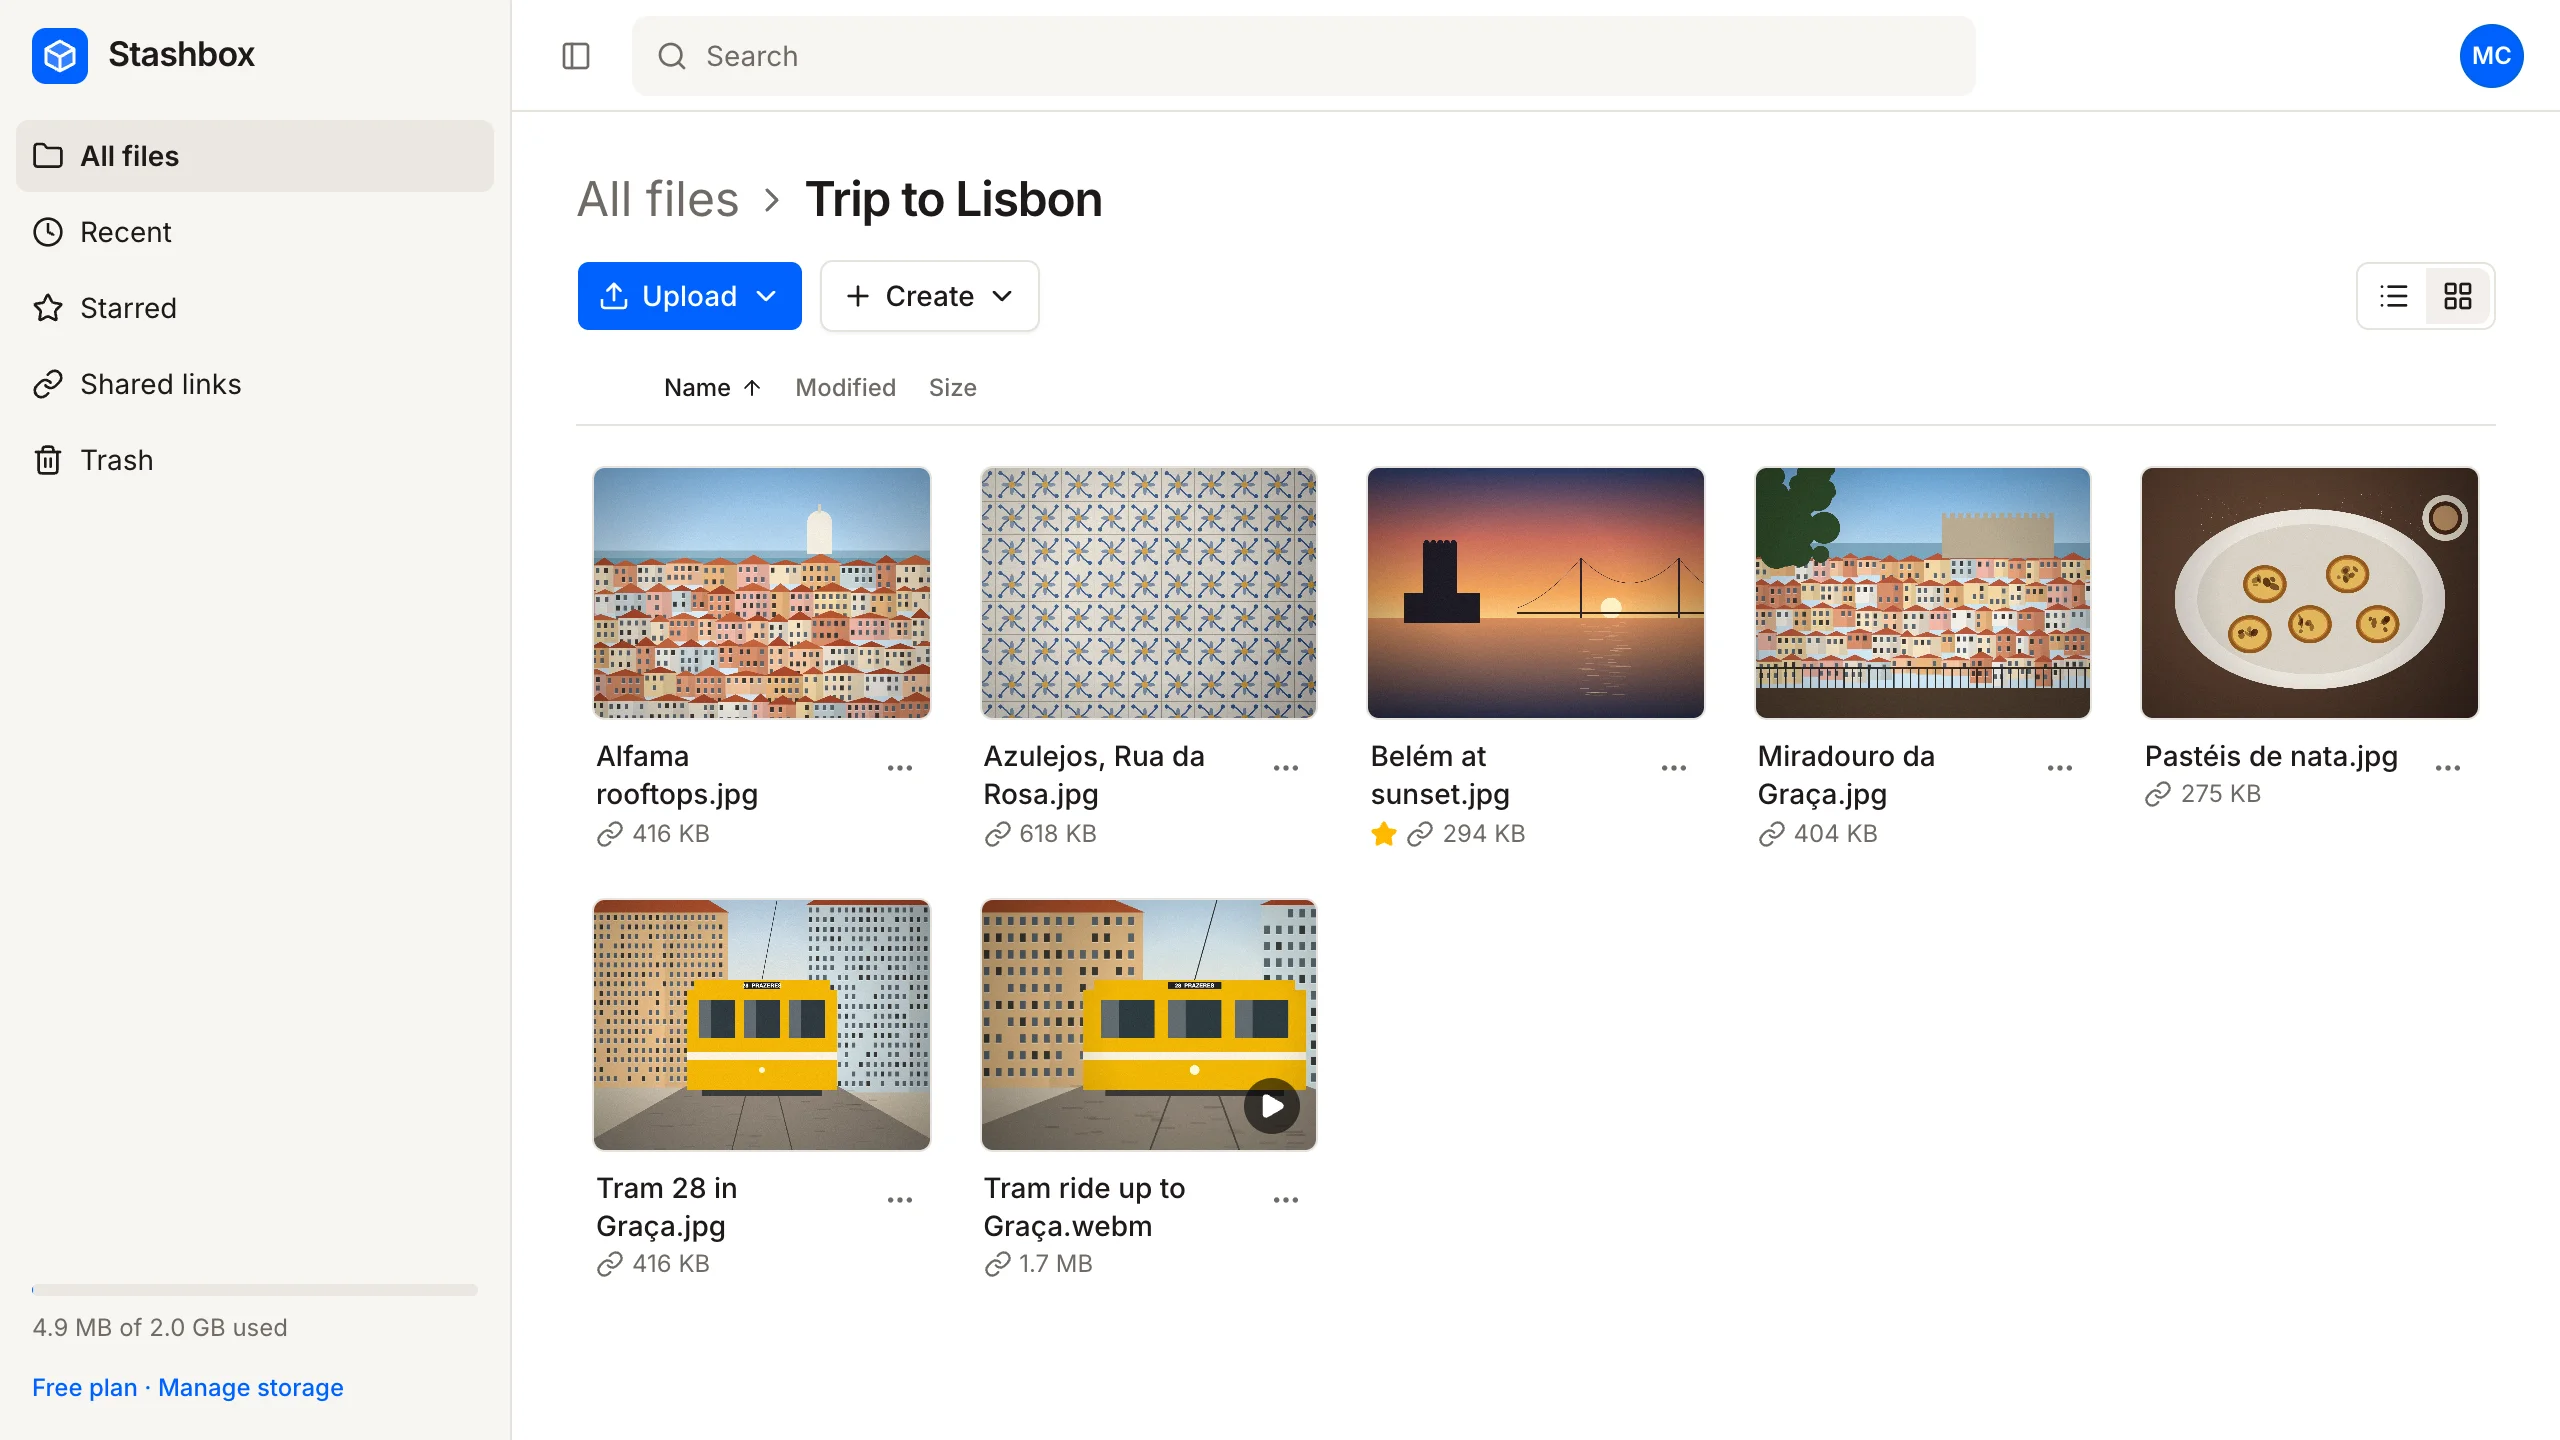
Stashbox is a Dropbox-style file storage app template. It has All files, Recent, Starred, Shared links, and Trash, nested folders, list and grid views, search, file and folder uploads, full-screen previews, ZIP downloads, and share links. To start from it, open Stashbox, choose Use this template, pick a team and project name in Layerwise, then choose Copy to Layerwise. The item record, direct uploads, Trash, and share checks are already implemented, so your work is adapting them. Other workflows are in the template gallery.
To start from scratch, enter a description in Describe the app you want to build... on the team home page, including the decisions above:
Build a Dropbox-style file storage app with email sign-up. Each person has
their own files and nested folders. Keep names and folders in the project
database and file contents in project Storage under generated keys, so renames
and moves never copy data. Upload files and whole folders by button or drag
and drop, sent straight to Storage with presigned links and a progress panel.
Give each person 2 GB, count Trash and uploads in progress toward it, and name
duplicates like "report (1).pdf". Deleting moves items to Trash, and Restore
puts them back in their folder. Add previews for images, PDFs, video, and
text, and a share link for any file or folder with an optional expiry date,
password, and download switch, all checked on the server.
The prompting guide explains how to describe users, data, and screens.
6. Test with two accounts and a private window
Once the local preview loads, sign up and test the main path. Choose Upload, then Folder, and pick a folder with a few photos and one large file. The upload panel should finish, the folder should appear with its files inside, and the storage meter should grow. Upload the same file twice; the second should get (1) in its name. Renaming a file to a taken name should be refused.
Next, delete a folder, then delete the folder that contained it. Restore the first one from Trash; it should return with its contents inside a recreated parent. The storage meter should drop only after Delete forever.
Then test sharing. Share a folder with a password and an expiry date, and open the link in a private window, where you are signed out. Enter a wrong password, then the right one, and open a file. The view count on Shared links should go up. Change the password, turn off Allow downloads, then Stop sharing, and reload the link after each change.
Sign up as a second user and confirm none of the first user's files appear. You can also create test accounts with Add user in Authentication. Open Database, select Local, and check the items, uploads, and shares tables: each row should belong to the right user, uploads should be empty once uploads finish, and a deleted folder's rows should share one trash_batch. In Storage, each uploaded file should appear under files/ with a generated name.
The local preview and the published app share one Storage, so test uploads are real files that count toward your credits. Use small files and delete them afterward. Databases are separate, so test accounts and rows stay local. If a check fails, open the preview console from Preview actions, or find the failed request in Logs.
7. Publish and improve it
Choose Publish in the preview header, then Publish in the menu, and open the live URL when the release finishes. New projects on paid plans start private, so turn off Private in the Publish menu before people sign up. The live app has its own empty database, so sign up again and repeat the checks, including a share link opened on a phone. The publishing guide covers release status.
Before launch, add your own terms and privacy pages and decide what people may share. Then choose the next change from what you observe. Sharing with specific people instead of a link is a bigger change, since it needs folder members and server checks on every request. A smaller step is a link that collects files:
Add a Request files option to the folder menu. It creates a link where a
visitor without an account can upload files into that folder, up to 20 files
of 100 MB each, without seeing what's already there. Count the uploads toward
the folder owner's space, check the limits on the server, and let the owner
turn the link off in Shared links.
Start from Stashbox if its file browser and share links fit what you need, or from a prompt if you need a different model. Either way, settle where bytes live, how space is counted, and what a link allows before adding features. For the full project workflow, follow the Quick start.