How to Build a Design Review App with AI
Build a design review app in Layerwise with pins on mockups, no-account client links, internal comments, version compare, and approvals.
Table of contents
Client feedback usually arrives as an email that says "the thing on the second page feels off." A review app fixes that by putting each comment on the design itself. The hard parts are who can see what, what happens when a new version arrives, and what counts as approval. Settle those before asking an AI to write code.
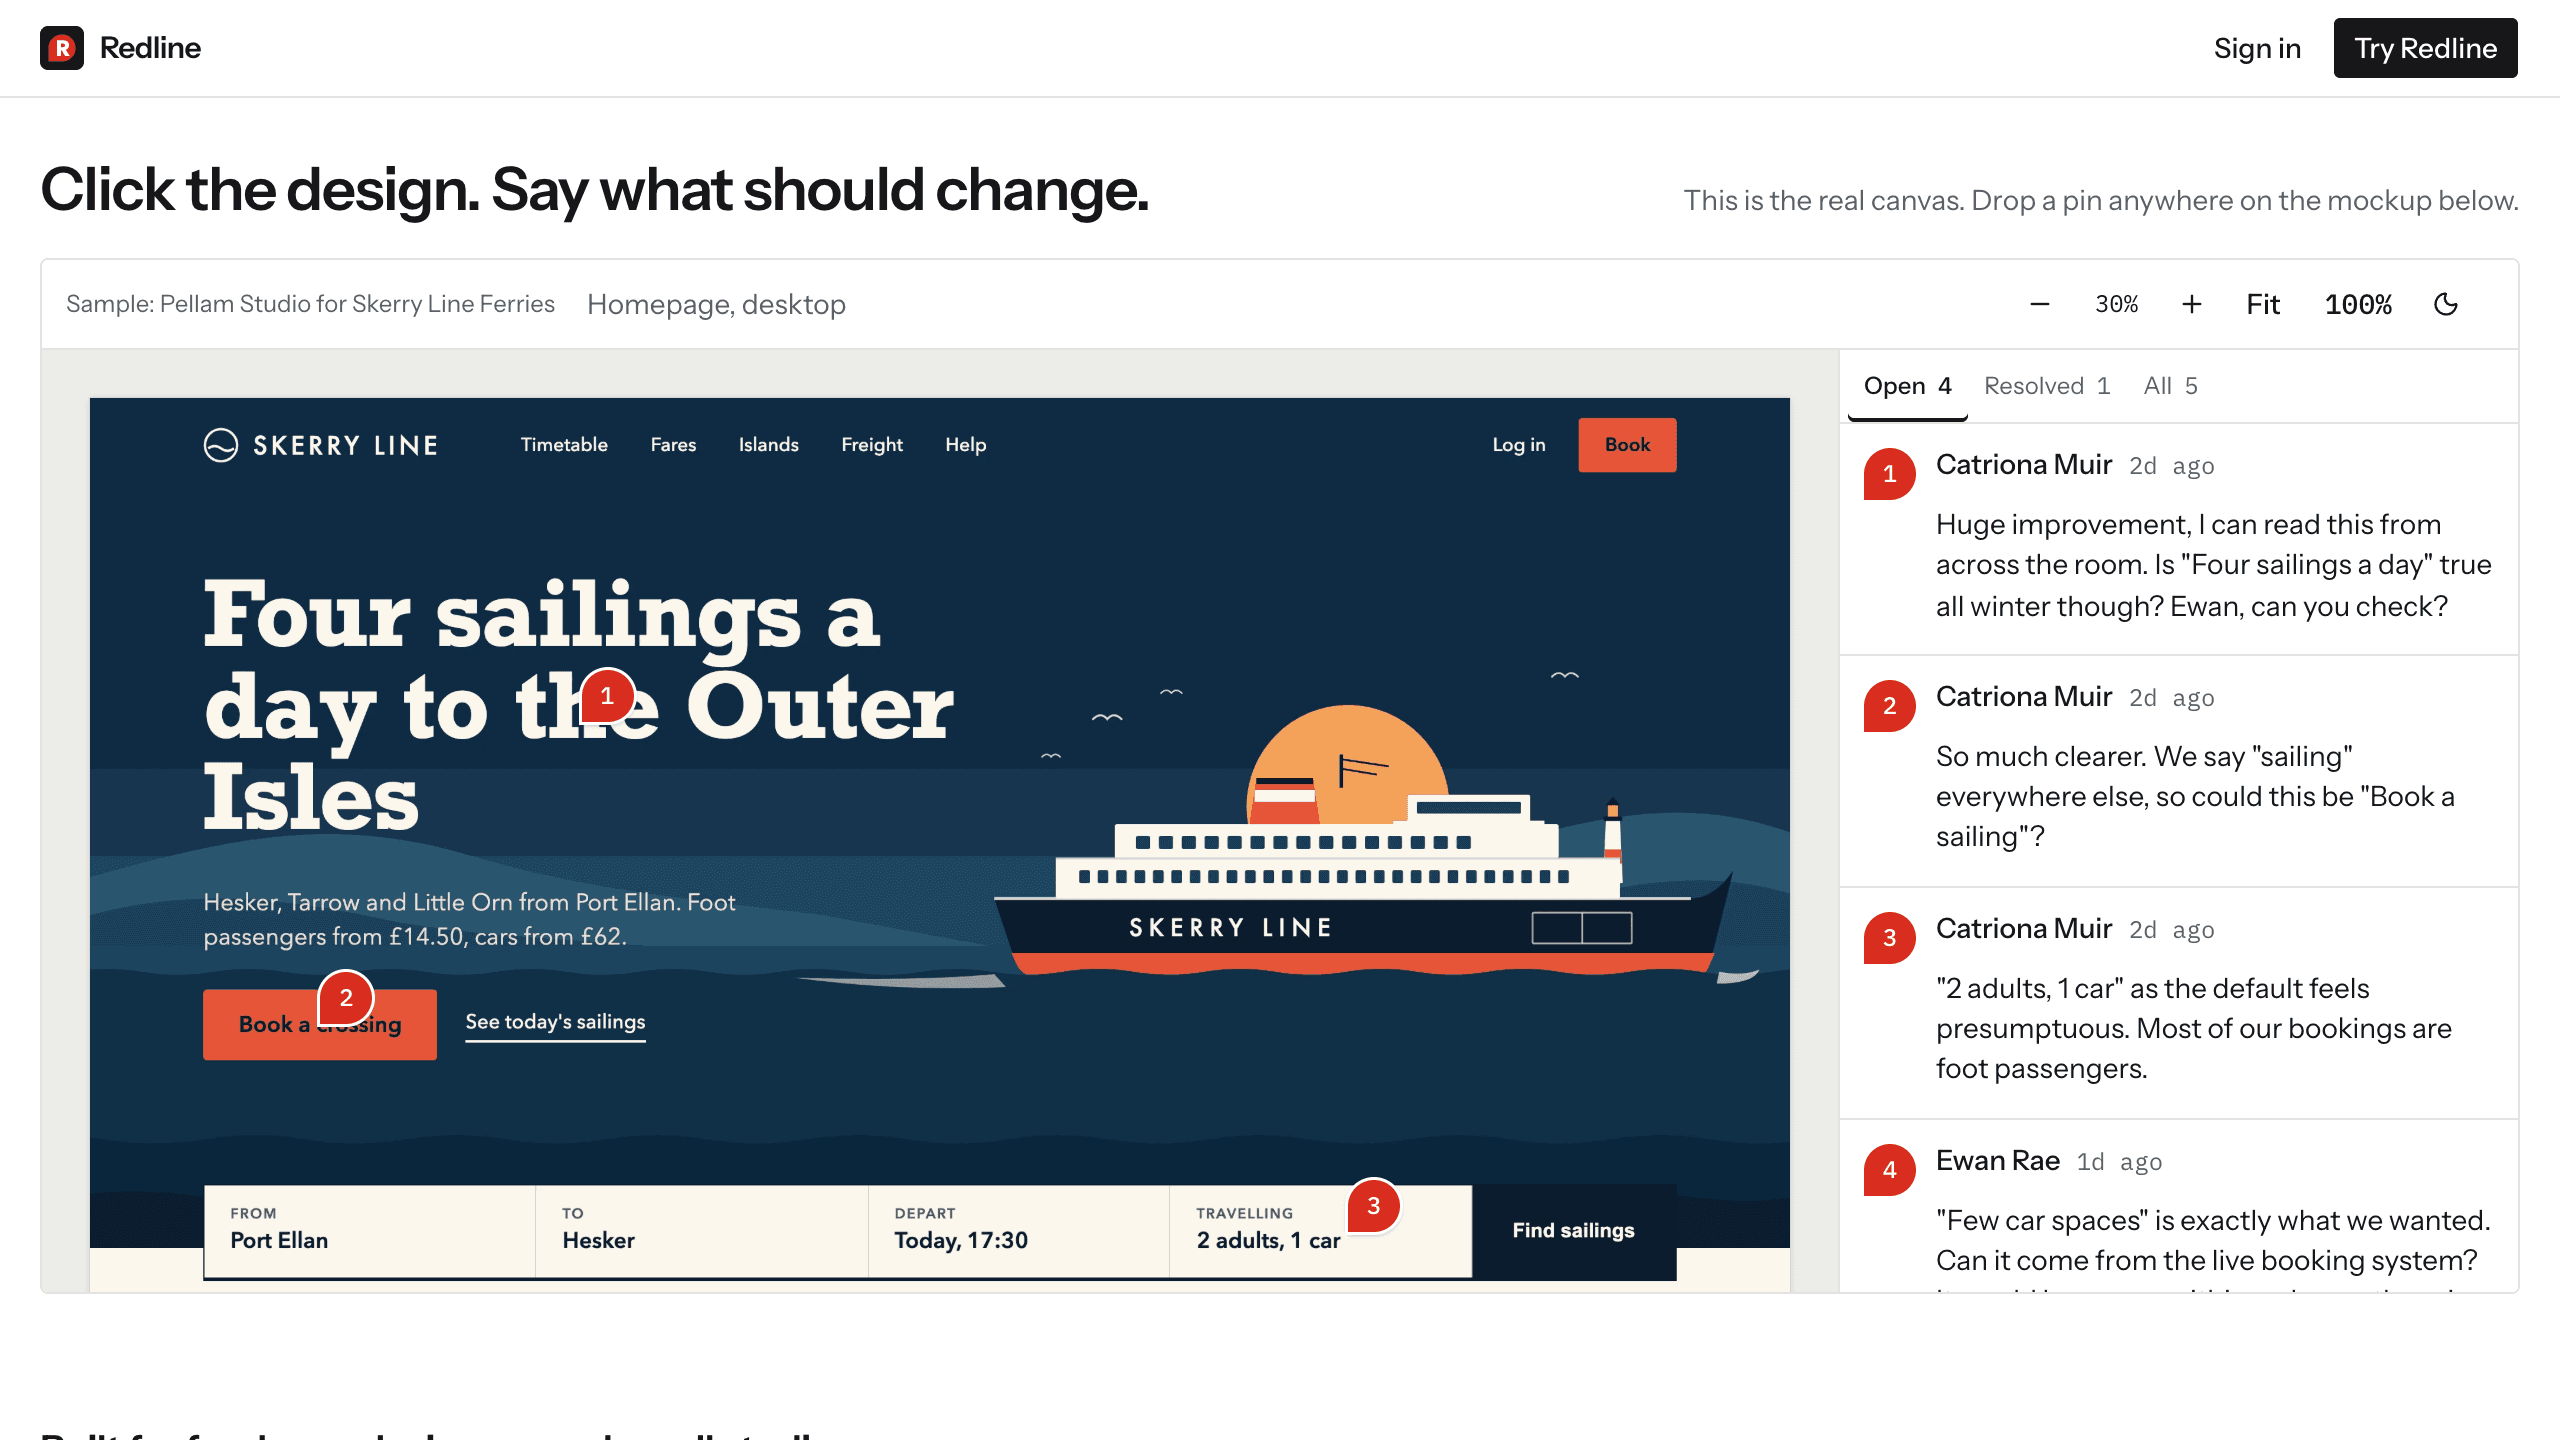
This guide builds a design review app with Layerwise. You will model reviews and versions, store pins so they stay in place, open links to clients, keep team comments private, plan approvals and email, start from the Redline template or a prompt, test, and publish. To see the result first, try Redline with sample data, which needs no account.
1. Settle the structure
Write down the structure first, because everything hangs off it. This is Redline's:
Workspace > Review (name, client name) > Asset > Version > PageAn image has one page, and a PDF has one page per PDF page. Comments belong to a page of a specific version, and that decision shapes the rest of the app.
A workspace has an owner and members. Check membership on the server in every function and route, since hiding a button doesn't protect anything. Redline has automated tests that confirm a member of one workspace can't read or change another's reviews, files, or invites.
2. Keep pins on the right spot
Store each pin as a position relative to its page, not in screen pixels. A client on a phone and a designer on a large monitor then see the pin on the same detail, at any zoom.
In Redline, the browser makes a WebP preview up to 2880 px wide and renders PDFs page by page in a web worker. The original stays in private Storage for download. The server checks each file's bytes and rejects SVG, which can carry scripts.
3. Let clients in without an account
Clients won't create an account to leave one comment. Each review gets a link with a long random token. The first time a client comments, Redline asks for a name and an optional email for reply notifications, then remembers them in a signed cookie.
Links need controls, because they will be forwarded. Redline supports an optional password with five tries per 15 minutes, an expiry date, an Allow downloads switch, and revoking or issuing a new link. Review pages use noindex, and the server checks access before it serves any file.
4. Keep team comments private
Designers need to say things that clients shouldn't read. Marking a comment Internal has to be a server rule, not a display rule. If the browser receives the comment and hides it, anyone can find it in the page's data.
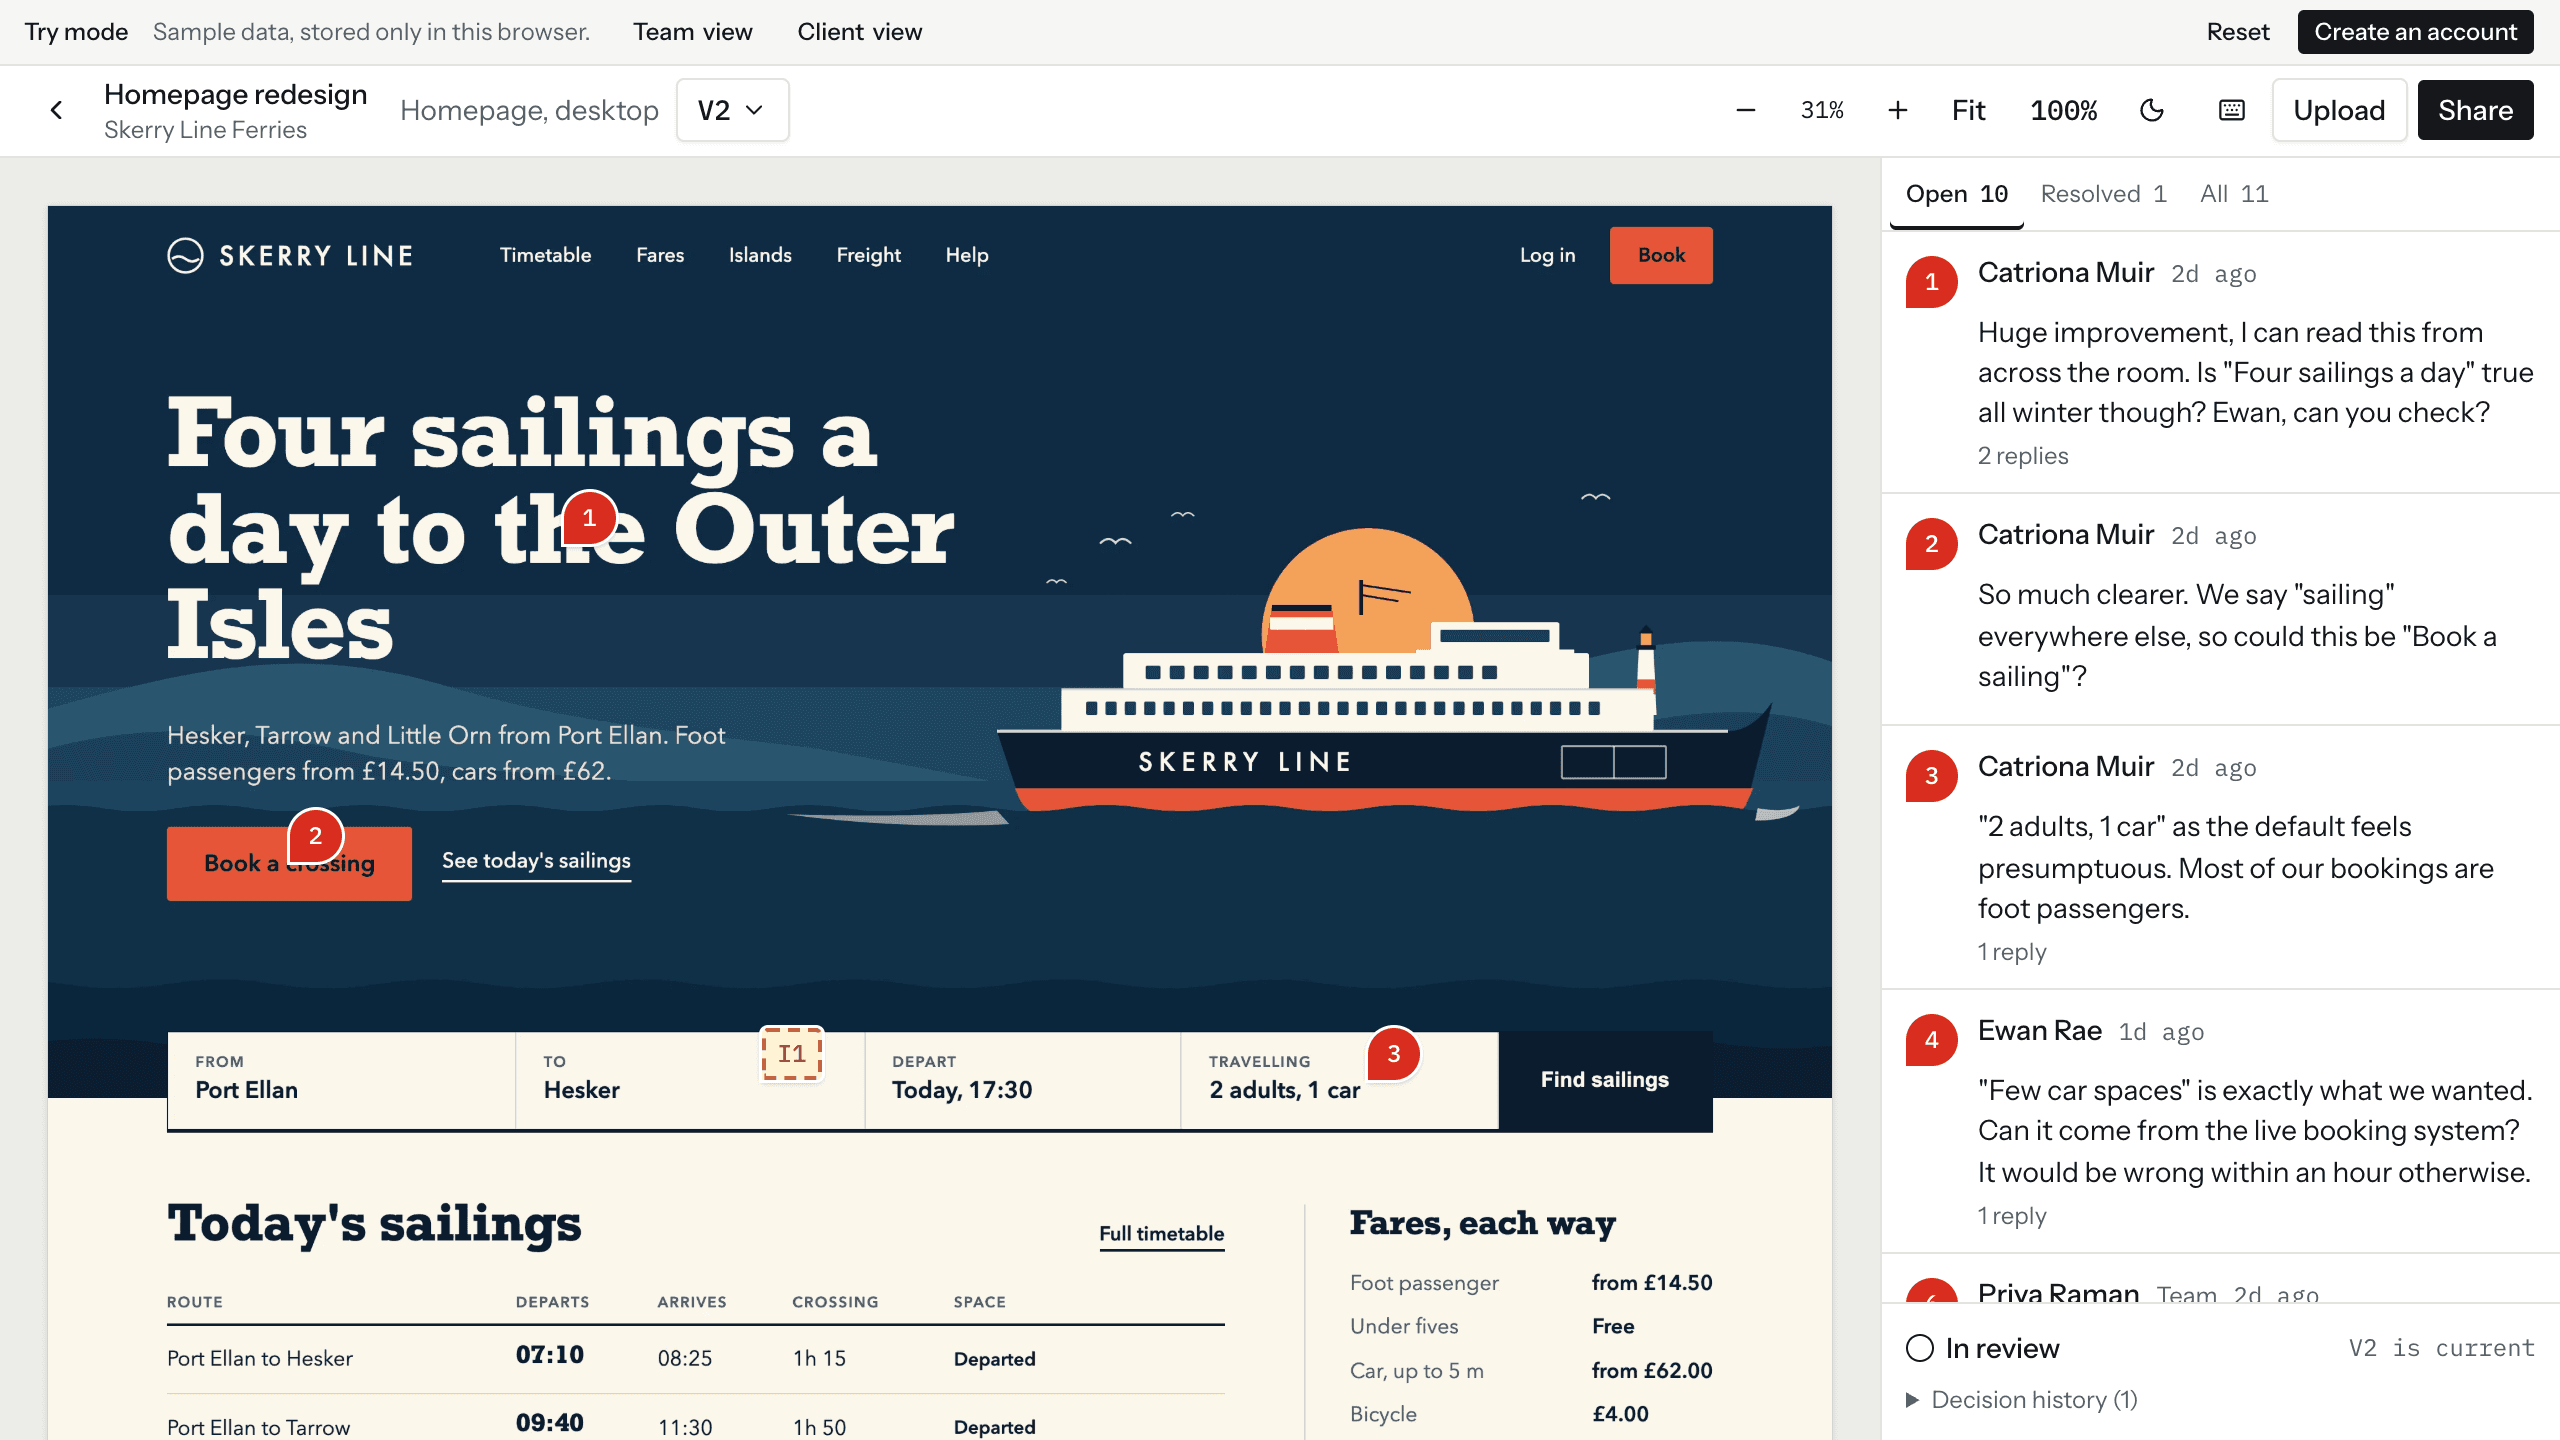
Redline's server filters internal comments out of everything a guest receives, and a test checks both the HTML and the data. Internal pins also number separately, as I1 and I2, so guests see no gaps in their numbering. If you add a field to comments later, tell the agent to keep this rule:
Add a priority to each comment: Low, Normal, or High. Team members and guests can
set it on their own comments. Show it in the comment panel. Internal comments must
stay out of every guest response, including this new field, and add a test for it.
5. Decide what a new version does
A designer uploads V2. Comments stay with V1, because they describe V1. An option copies open comments forward, labeled From V1, so nothing gets lost. Compare any two versions side by side or with a slider.
6. Make approval mean something specific
Approval applies to one asset's current version. Each decision records the name, the time, and the version number. A new version returns the asset to In review and keeps earlier decisions in a visible history, and a review is approved only when all of its assets are.
Be honest about what the record is. The name is whatever the guest typed, so label it that way and don't describe it as verified. It works well as a working record. If you need proof of who approved, plan a verified step as a separate feature.
7. Plan email around your limits
Published Layerwise apps have daily email limits shared across every workspace, and they don't run scheduled jobs. So skip timed digests, and send each email for a clear reason:
- To clients: when a team member shares the link, when the team replies, at most once per review per hour per guest, and when a team member chooses Notify clients on a new version.
- To the review's creator: when a guest chooses Send feedback, approves, or requests changes, and on a guest's first comment, at most once per review per hour.
An anonymous guest's request should never email an address they just typed. A failed email shouldn't fail the action either, and the app's inbox keeps everything visible. Redline also limits each workspace to 50 client emails a day and 2 GB of files, since every workspace shares your project's limits. You can change both in src/redline.config.ts.
8. Choose a starting point
Download Layerwise, sign in, and select a team. Open the Redline template and choose Use this template to copy it into a project. Redline includes workspaces, the review canvas, version compare, approvals, an inbox, email updates, sample data, and try mode.
To start from scratch, enter a description in Describe the app you want to build... on the team home page. Include the structure above, page-relative pins, the guest link rules, the Internal comment rule, and your email events.
9. Test as the team and as a client
Sign up, drop in an image and a PDF, and create a review. Choose Share, then Copy link, and open it in a private window. Click the design, write a comment, and enter a name when asked. It should reach the team's Inbox within about 15 seconds.
Add an Internal comment as the team, reload the private window, and confirm the client can't see it. Upload a new version and copy open comments forward. As the client, choose Approve, then upload another version: the asset should return to In review, with the approval still in Decision history.
Revoke the link, and the private window should stop showing the design. Check emails under Email in Local, since the preview never sends real email.
10. Publish and improve it
New projects on paid plans start private, so turn off Private in the Publish menu, then choose Publish in the preview header. The local preview and the published app share one Storage, so test files count toward your usage. Replace the fictional sample studio and decide on your limits before you open sign-up.
Start from Redline if pinned feedback on images and PDFs fits your work. Settle visibility, versions, and approval first, and later features have clear rules to follow.