How to Build a Designer Portfolio with AI
Build a designer portfolio in Layerwise with a distinct visual style, real case studies, fast responsive images, and a contact form that works.
Table of contents
A designer's portfolio is judged twice: once for the work and once for the site around it. A site that looks like every other AI-generated page costs you before anyone opens a project. So decide on a point of view first, then ask the agent for pages.
This guide builds a public portfolio with Layerwise. You will pick a visual direction, set up projects as files, plan case studies, handle images, add a contact form, test, and publish. There are three templates to start from, and each one is a complete site with a fictional owner and finished sample work: Gridwork, Broadsheet, and Overprint.
1. Choose a visual direction
Pick the style your best work already suggests. A strict grid flatters systems and identity work, and an editorial layout gives long projects room to read. Print-inspired experiments suit posters and motion.
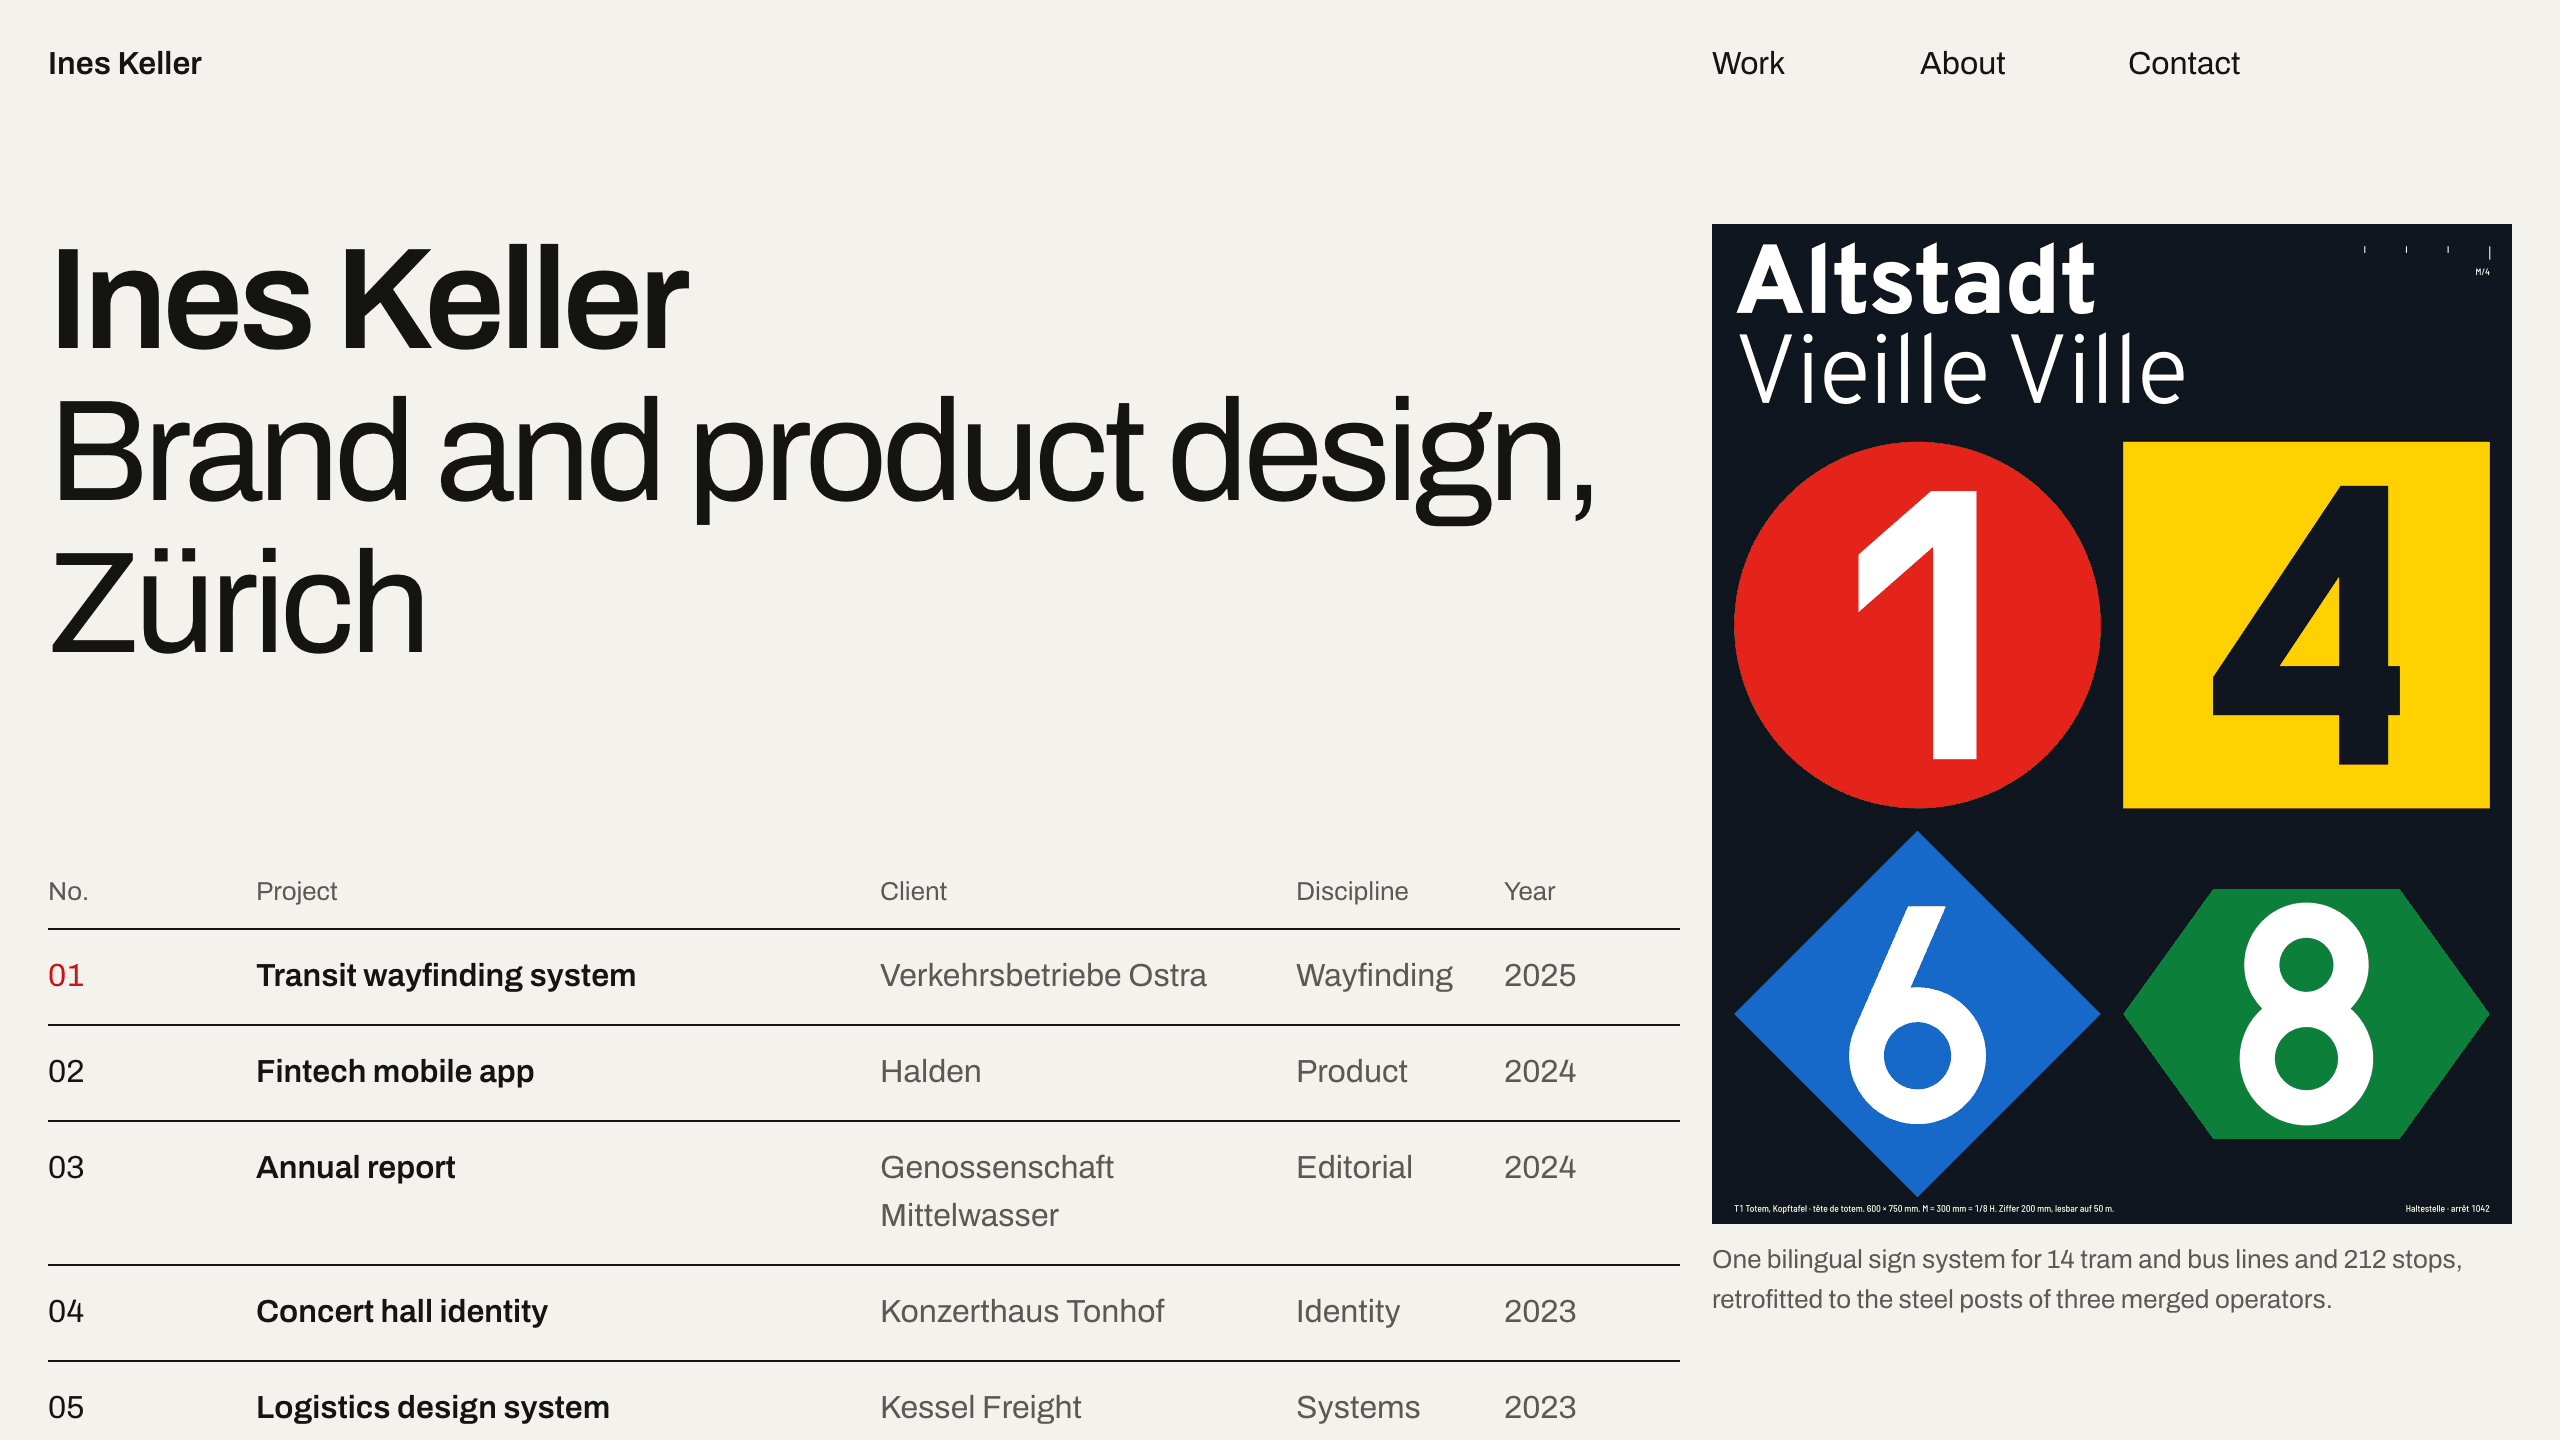
Gridwork follows the International Typographic Style: twelve columns, one grotesque, and one red. The home page is an index table, and each row shows its cover when you hover or focus it. Press G to see the grid.
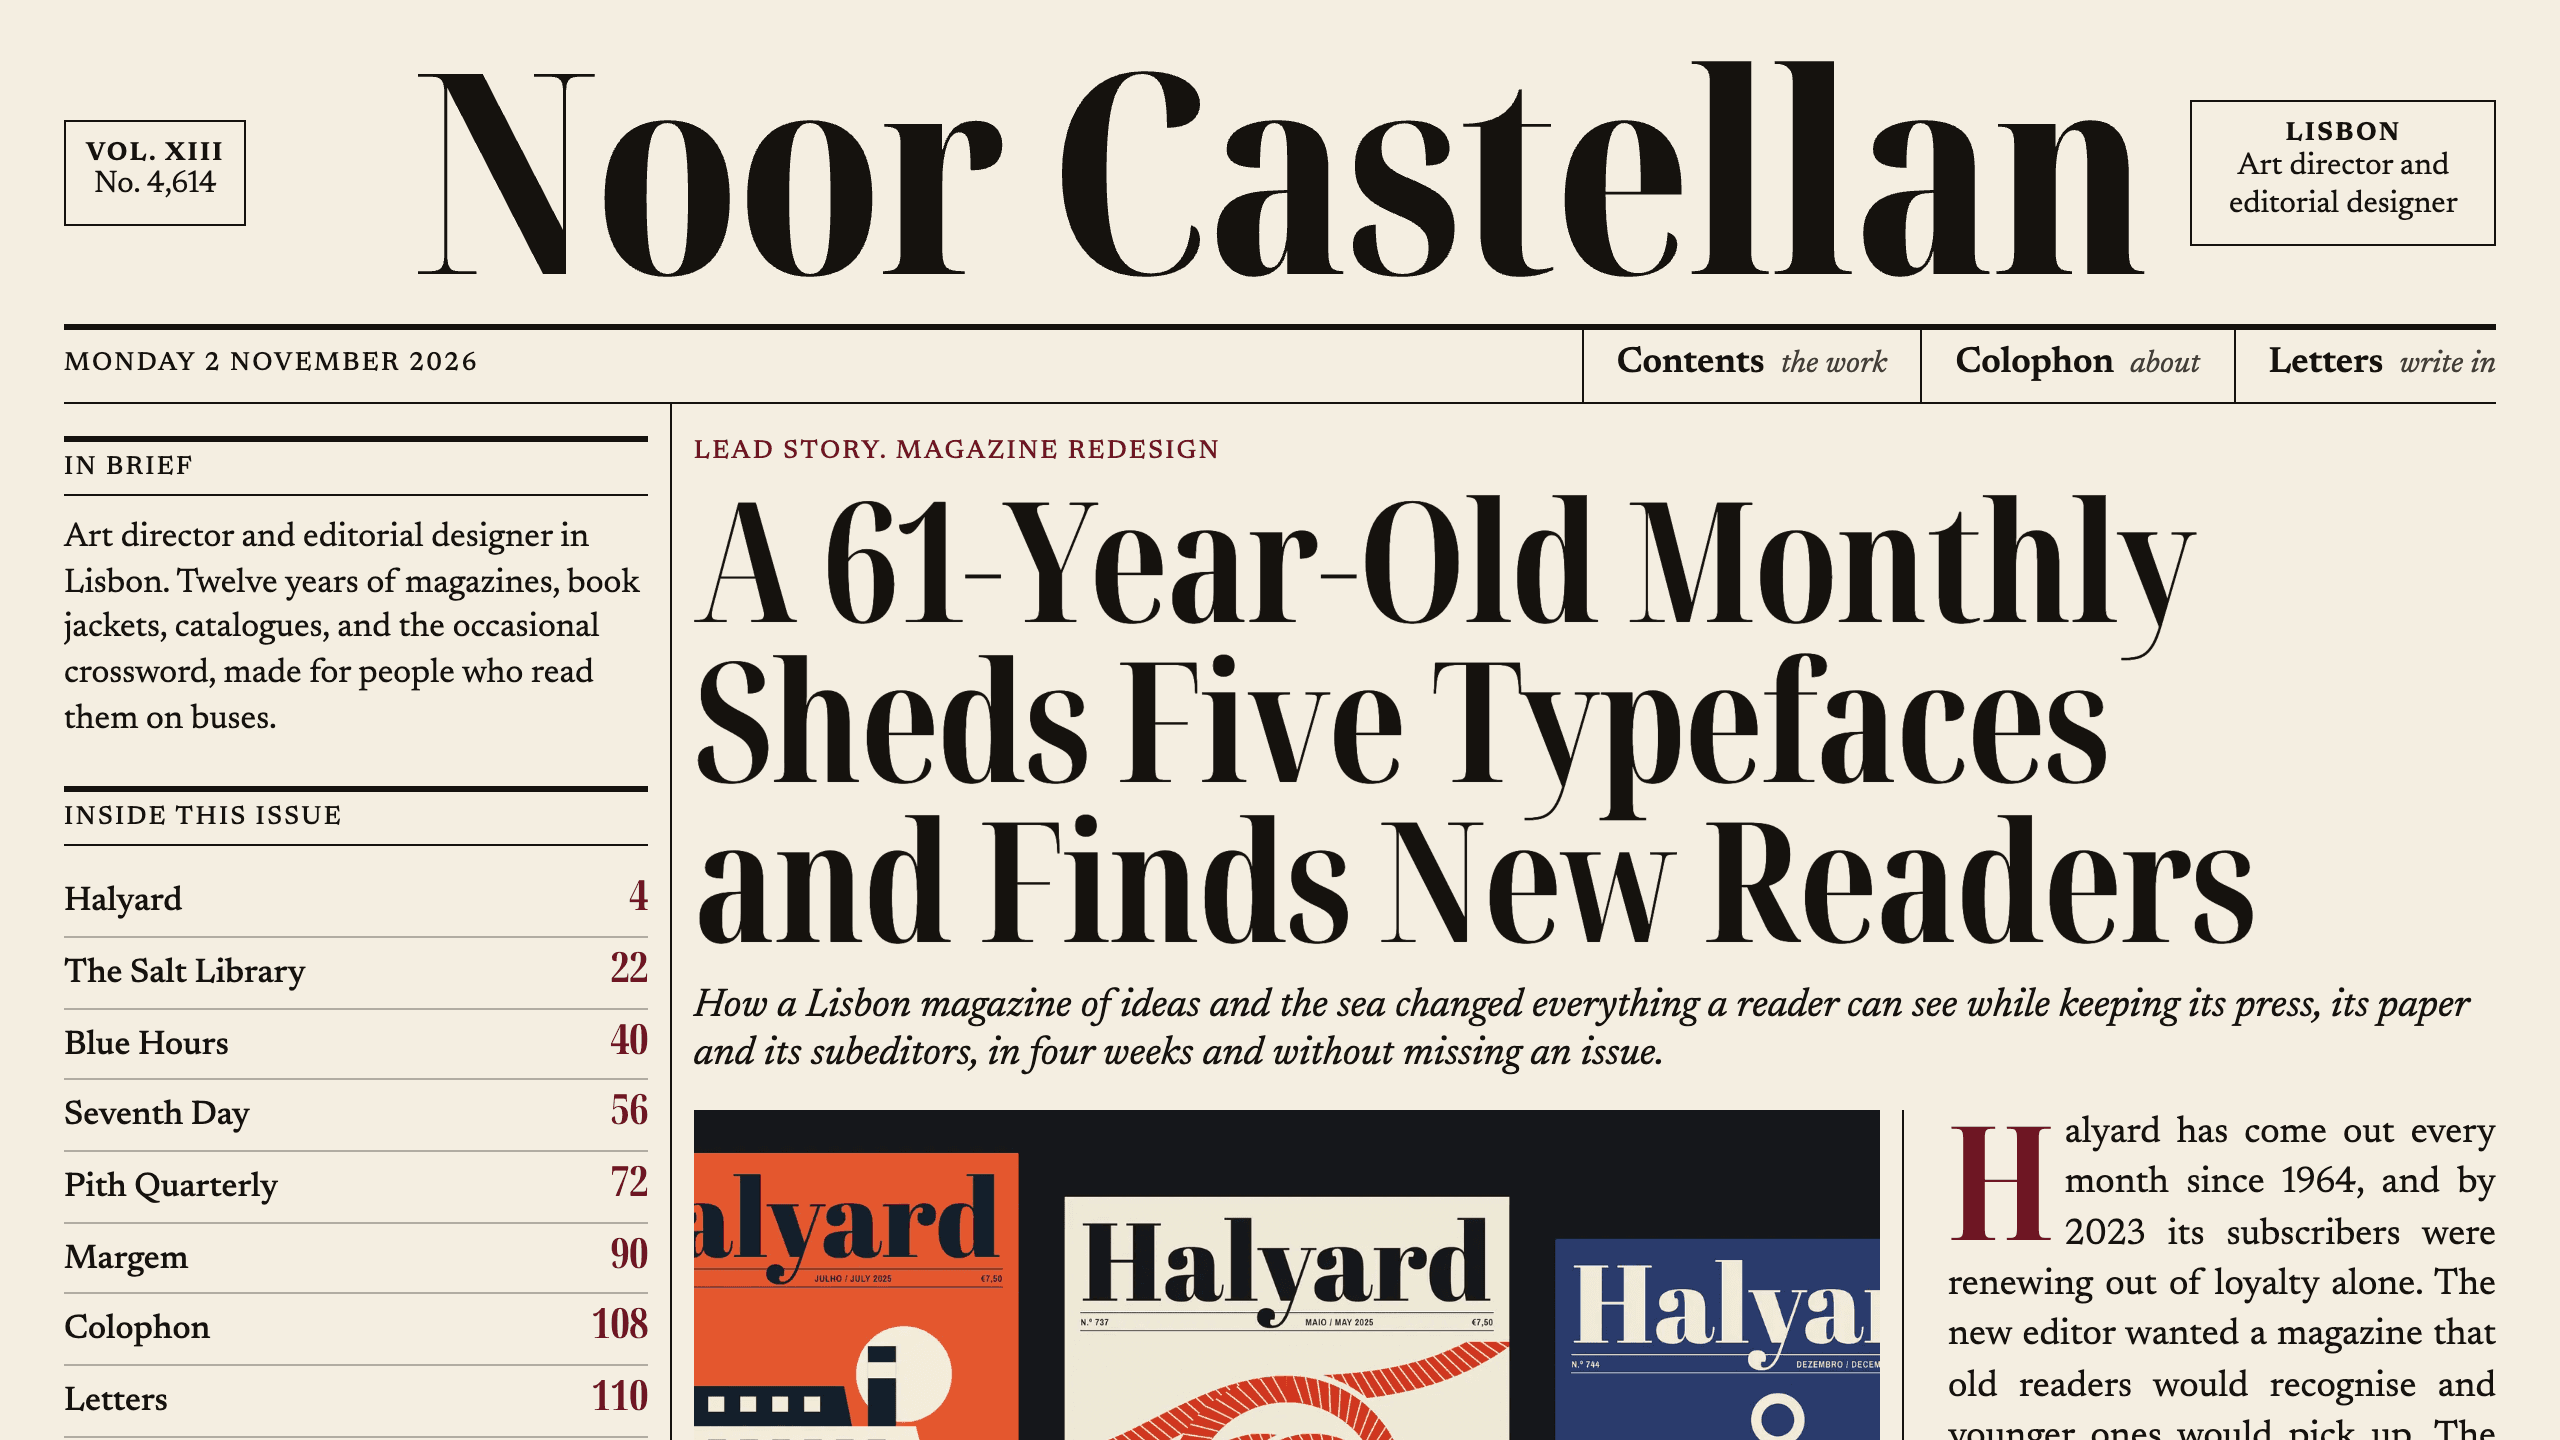
Broadsheet is set as a newspaper. The featured project is the lead story, the work index is a Contents page with folio numbers, and case studies read as long features.
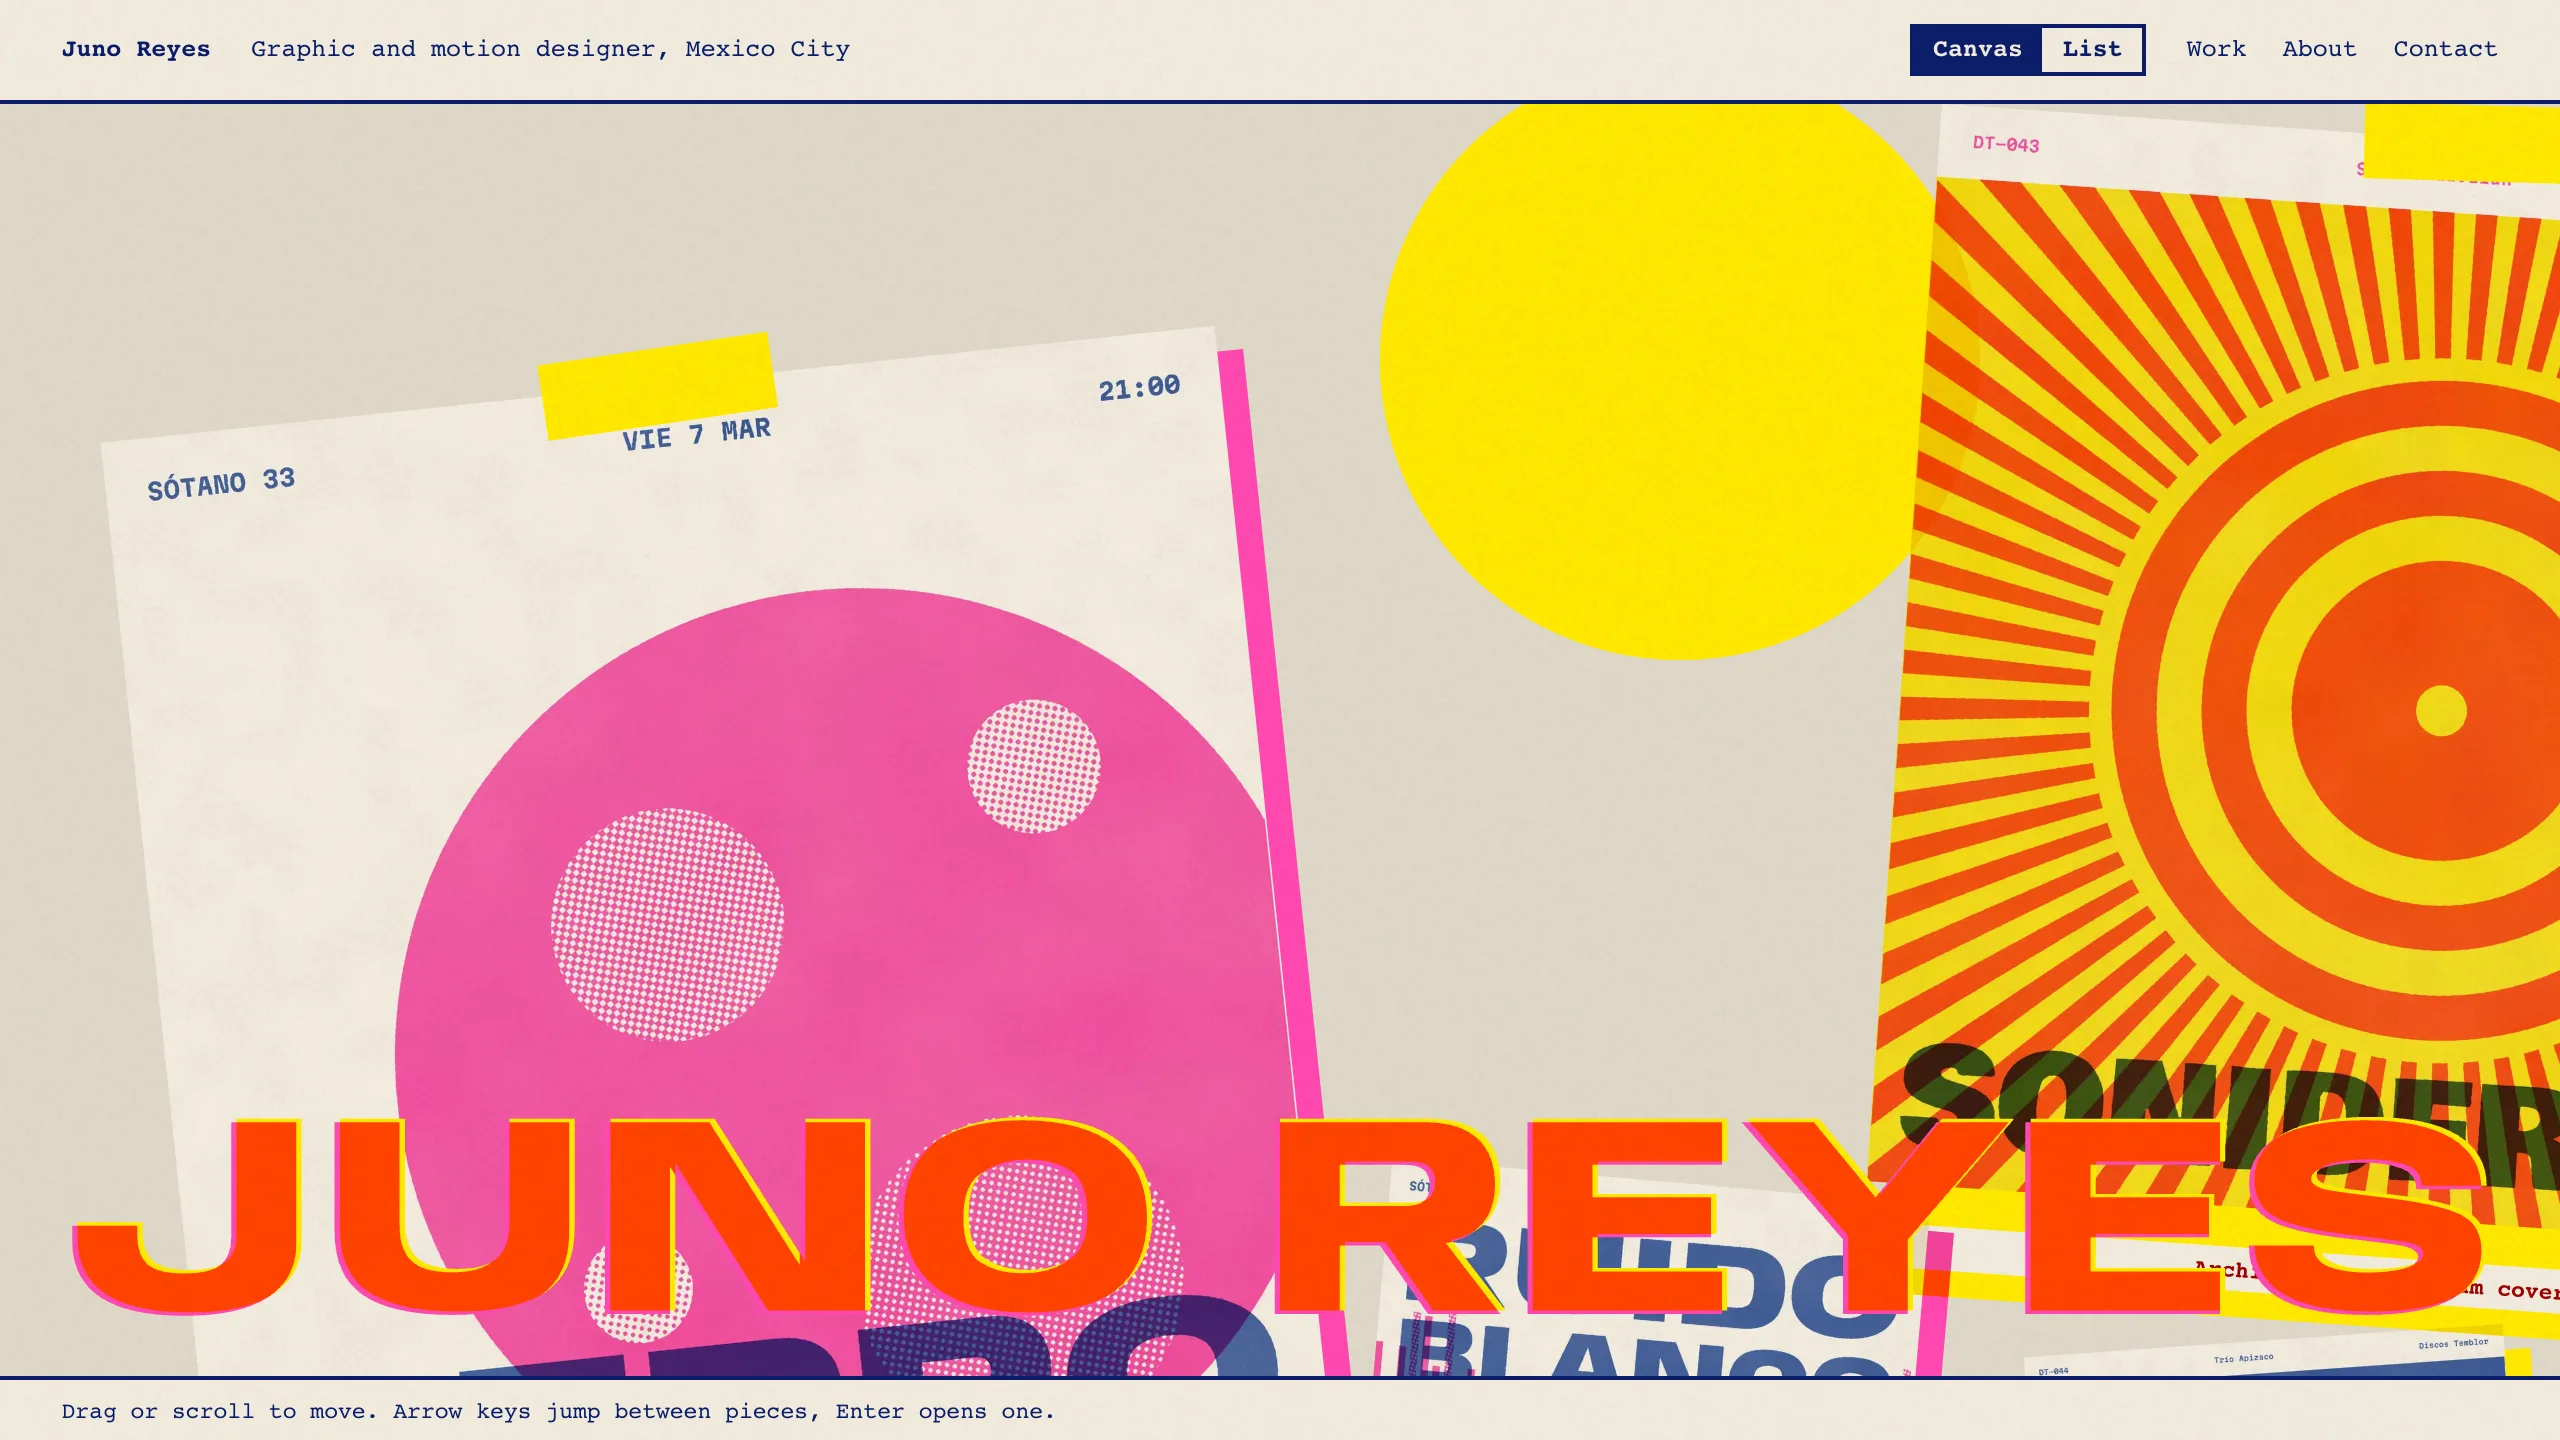
Overprint behaves like a risograph. Work is pinned across a large canvas you can drag, and fluorescent inks overlap on newsprint. A List switch shows a plain index for anyone who wants one.
Whichever you choose, tell the agent what to avoid as clearly as what you want. Gradients, rounded cards with shadows, and rows of three feature boxes are what make a portfolio look generated.
2. Decide where the content lives
A portfolio is public and has one owner, so it doesn't need accounts or an admin area. In these templates, content is plain files, and you change them by asking the agent:
src/portfolio.config.ts      name, role, bio, links, fonts, colors, ownerEmail
src/content/about.ts         services, clients, experience, CV
src/content/work/<slug>.ts   one typed file per case study
Skipping the sign-in pages and admin screens means fewer things to maintain and nothing for a visitor to trip over. /sign-in and /dashboard return a 404 in all three templates. If you later want to edit from a phone, you can ask for a CMS, and the typed files give it a clear shape to follow.
3. Write case studies people finish
Most people skim, so give them the answer before the story. Every case study here has the client, year, role, disciplines, and outcome up front, then a sequence of blocks: full images, image pairs, galleries of up to four, text, quotes, video, and metrics.
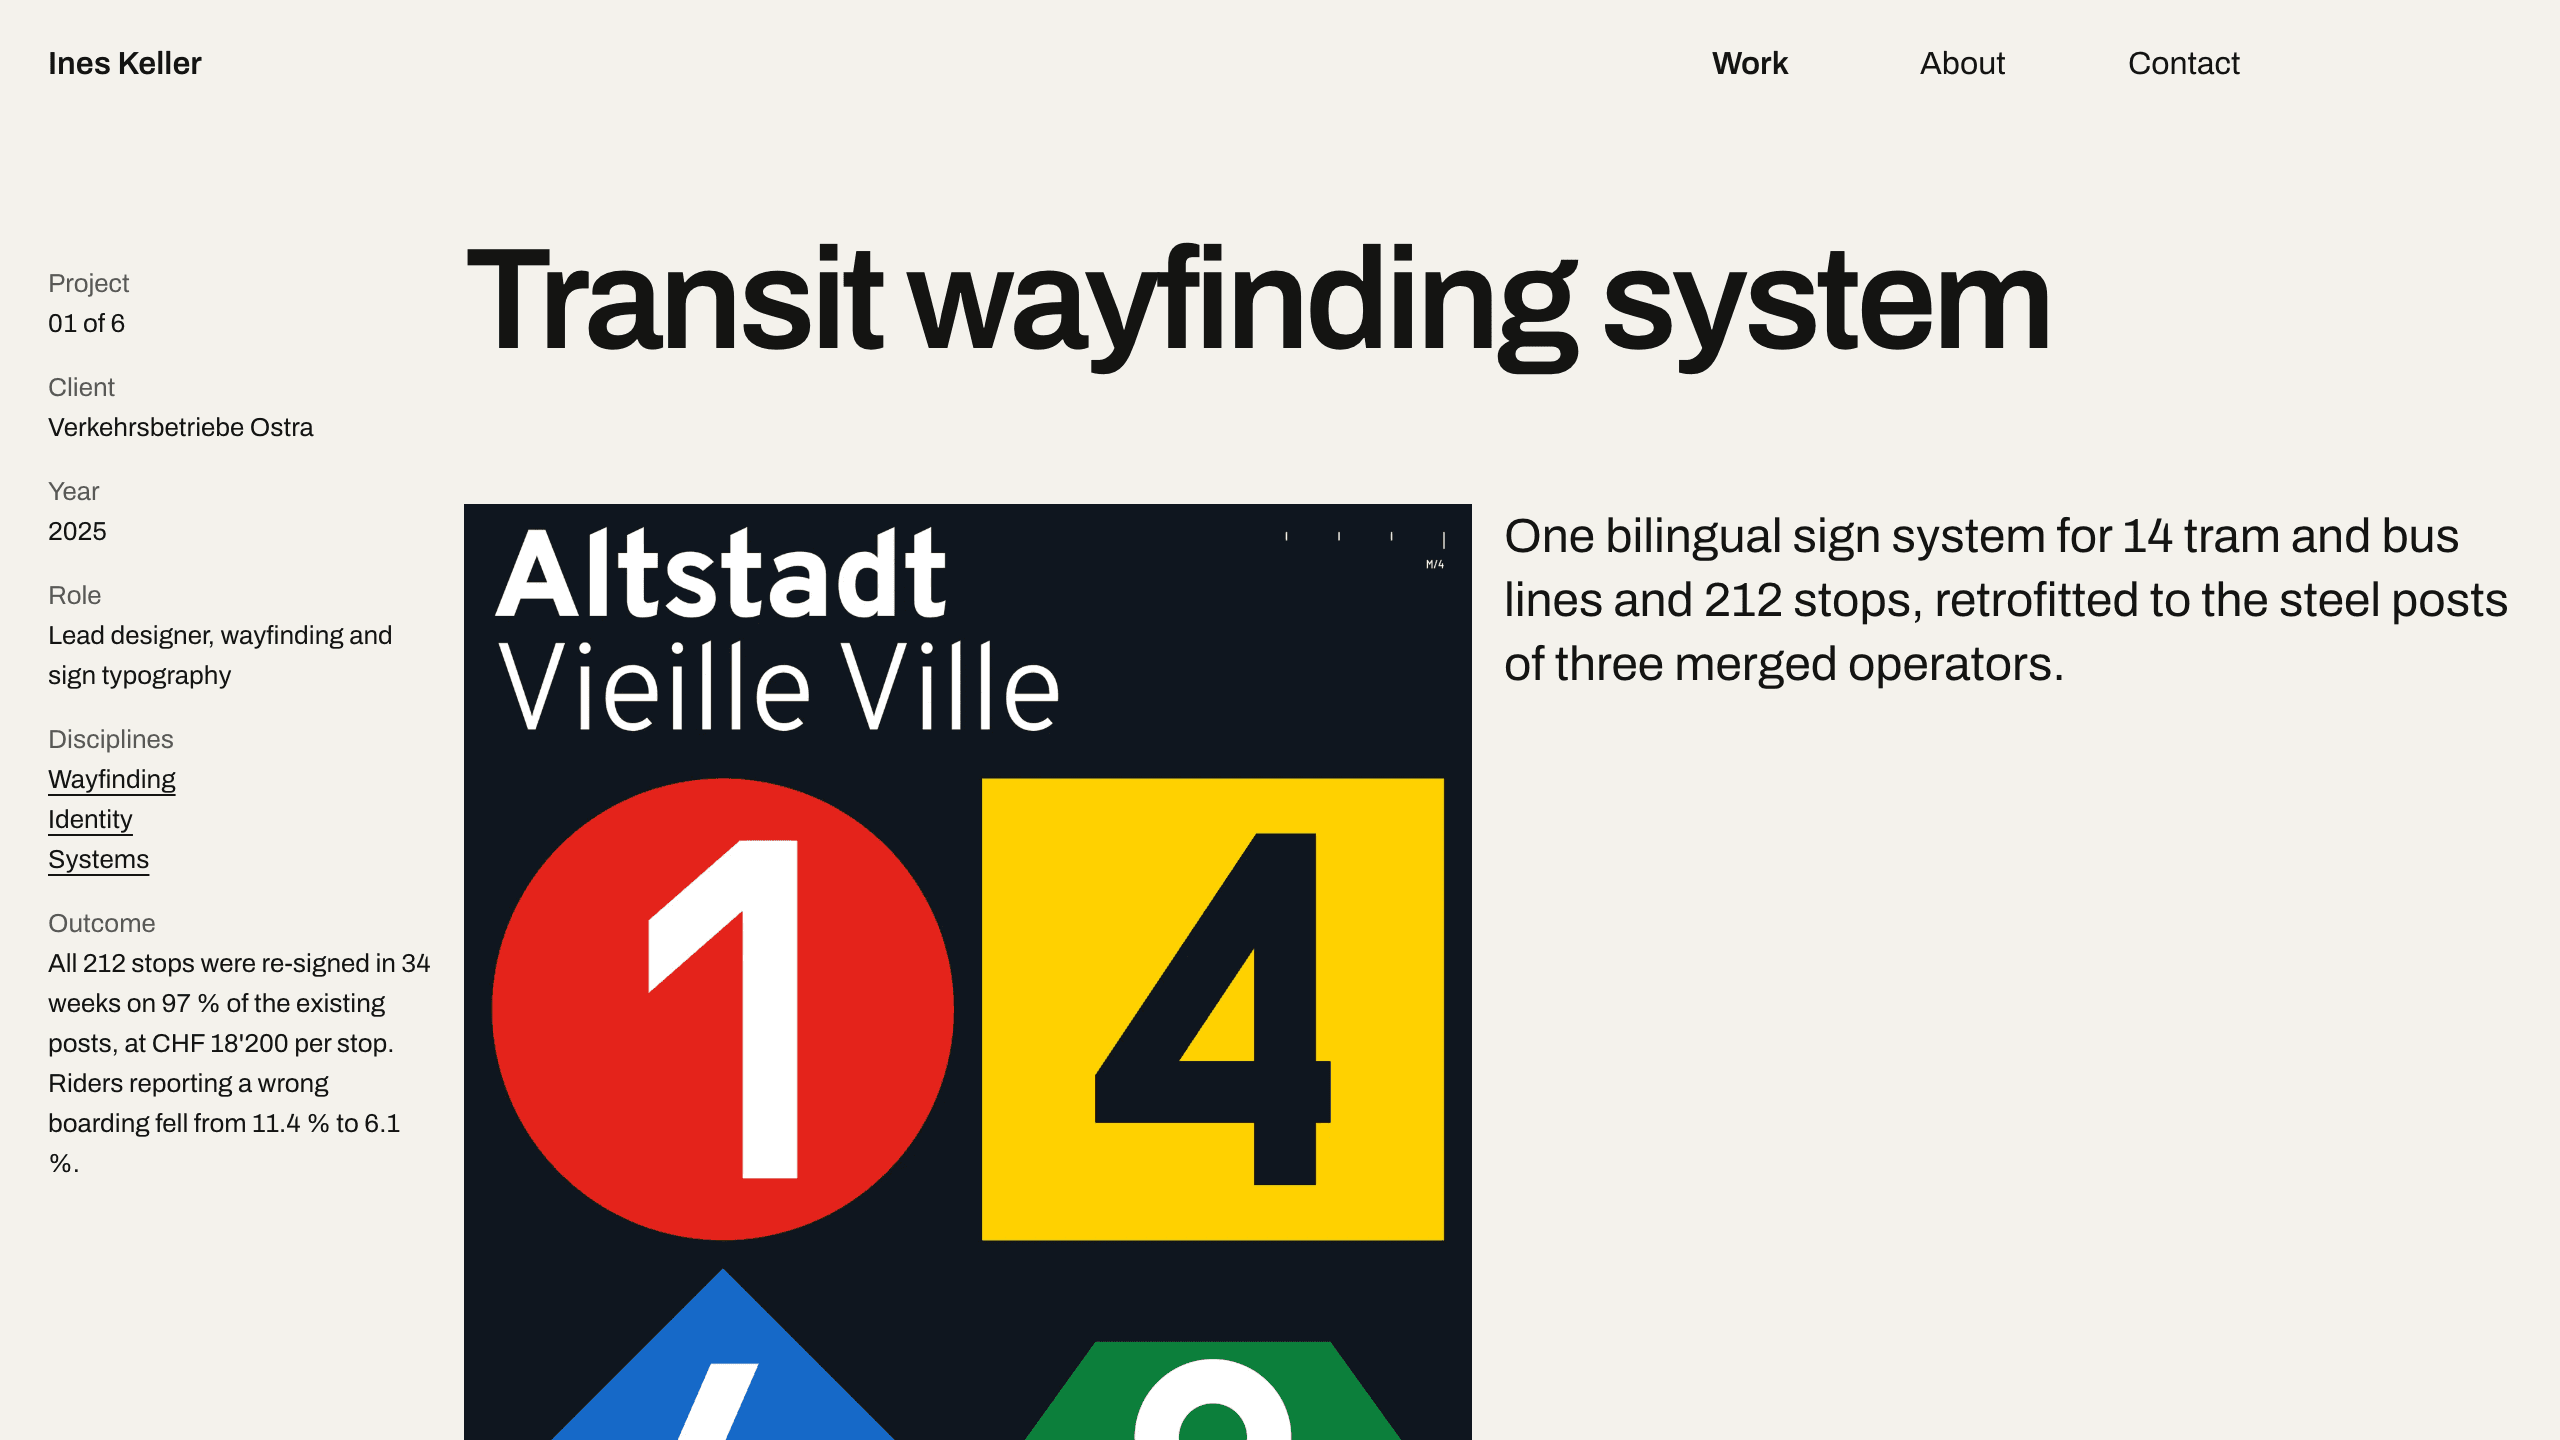
For each project, write down the brief, the constraint, the decisions, and the result. The constraint is what makes the story worth reading. "Retrofitted to the steel posts of three merged operators" tells a reader more than "a clean, modern system." If a metric isn't yours to share, describe the outcome in words instead of inventing a number.
4. Make images fast and steady
A portfolio is mostly images, so this is where it gets slow and where the page jumps as it loads. Each template includes one script for this:
pnpm add-images my-project path/to/imagesIt writes 800, 1600, and 2880 px WebP versions, records each image's dimensions, and makes a tiny blur placeholder, so pages reserve the right space. GIFs stay untouched, and SVG is rejected. To add a project, ask the agent:
Add a case study for the attached images called Northline Rebrand. Use
pnpm add-images with the first image as the cover. Client: Northline Transit.
Year: 2026. Role: lead designer. Write the brief, the constraint, the decisions,
and the result from my notes below, and check it at phone width.
5. Add a contact form that gets read
The contact form saves each message to the database, where you can read it under Database. It also has a hidden field for bots and a server-side rate limit. Set ownerEmail in src/portfolio.config.ts to get messages by email too. Layerwise Email sends them, and it starts working after your first publish. Your address stays on the server.
6. Choose a starting point
Download Layerwise, sign in, and select a team. Open a template page and choose Use this template to copy it into a project. You can then ask the agent to replace the sample owner and projects:
Make this portfolio mine: I'm Mara Lind, a product designer in Toronto. Remove
the sample projects, keep the layout and type, and add the attached work as the
first case study. Update the About page from my CV.
To start from scratch, enter a description in Describe the app you want to build... on the team home page. Include your visual direction, what to avoid, the content files, and the checks in the next section.
7. Test it the way a client will
Check every page at desktop and phone widths. On a phone-width window, nothing should scroll sideways, and images shouldn't push text around as they load.
Press Tab through the home page. Every link should show a visible focus ring, and in Gridwork the cover should follow your focus. Turn on reduced motion in your system settings and reload: Overprint should open on its plain List view.
Send the contact form, then look for your message in the contact_messages table under Database in Local. Paste a case study link into a chat app after publishing to see its share image, which comes from the project's cover.
8. Publish and share
New projects on paid plans start private, so turn off Private in the Publish menu, then choose Publish in the preview header. Before you do, replace the fictional owner, clients, figures, and social links. Then connect a custom domain, since your own name makes the strongest address for a portfolio.
Choose the template closest to your work, or start from a prompt if none of them is. Either way, settle the point of view first, and every later change gets easier to judge.